#92541, "Made foggy headlights beautiful again (progress pics)"
My headlights were developing a bad case of cataracts, so I decided to go the wetsanding route instead of buying the ebay projectors. My eyes are still good at night so I didn't really need to spend the money on projectors anyway
Here is what I had to begin with. Notice the condensation:
closeup of the condensation:
There are four bolts that hold in each headlight. 3 are easy, but the 4th bottom bolt makes up for it. Word on the street is, you don't need to take off the bumper if you can get to that bottom bolt with an extension. Well you need a very long extension, and still has to do some crazy maneuvering to get to that bolt. It's actually easier to just take the bumper off IMO
Just like mom used to make! - I only heat it up for 2-3 minutes at 250 degrees. Comes apart pretty easy. Be careful not to let the glue fall into the chrome housing.
Now, at this point I sanded the outside. 400->1500->2000 wetsanding on the outside. Then use mcguires plastic polish (microabrasive) to finish it. For the inside, I just used the mcguires plasitic polish. It removes the inside film easily. I put them back together with door/window silcone that you can find at home depot. works great! Compare the finished passenger headlight to the driver headlight.
close up of passenger light reassembled:
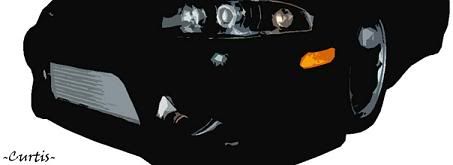
closeup of drivers side. Now you can see what a difference it makes!
I guess I could have made demon eyes too, but I didn't want to spend the time on it. but the insatiable urge to take the orange lens out was too much for me
#92547, "RE: Made foggy headlights beautiful again (progress pics)" In response to Reply # 2
Good Job! I have never seen 2gb lights in that kind of condition though that looks horrible. Your lights were looking like the run of the mill 2ga style lights.
98' Eclipse GS- Hahn Stage 2- SOLD 02' Honda S2000- SOLD 04' Acura TL- Current Whip
#92550, "RE: Made foggy headlights beautiful again (progress pics)" In response to Reply # 4
Demon Eyes???
I didn't think that happened to 2gb headlights.
first time I did mine was 2000 grit wetsanding then taking a buffer to them at the same time I was buffing out my paint (after wetsanding out the orange peel in the clear that didn't lay down right).
#92580, "RE: Made foggy headlights beautiful again (progress pics)" In response to Reply # 6 Feb-20-06 07:17 PM by edxmon
yo man, i found the 3M liquids i was talking to you about, just hit me up and well clear those head lights down to hell!, btw nice work, check out my addition to Squids "wet sanding headlights" thread, those things will do wonders!
Originally posted by turbo8u his girl kept looking out and down my car like uh ok we're in this 100 whatever thousand dollar car and that little whatever it is just raped us.... turbo screamed past the window like a vortex of ownage :-P robbing his engine of all the air around, and thats how i like it
Originally posted by ez I came across a huge sack of walnuts in my grandmas garage - I better make use of them.
#92583, "RE: Made foggy headlights beautiful again (progress pics)" In response to Reply # 7
Originally posted by edxmon yo man, i found the 3M liquids i was talking to you about, just hit me up and well clear those head lights down to hell!, btw nice work, check out my addition to Squids "wet sanding headlights" thread, those things will do wonders!
3M Finesse-it Finishing Material? That's what I used.
#92593, "RE: Made foggy headlights beautiful again (progress pics)" In response to Reply # 8
Nice work, Erik. 500-1500-2000-polish? I really need to do that to mine. Only, I've got the flakey clearcoat action going on mine. I must have the ill-fated 2Ga headlights, since I picked up Daisy in late 96 as a 97. Talons just kept using the same housings...