| Go back to previous topic |
| Forum name | Performance/Engine |
| Topic subject | Some progress with the 2.2L |
| Topic URL | http://forums.2gnt.com/dcboard.php?az=show_topic&forum=5&topic_id=126428 |
126428, Some progress with the 2.2L
Posted by eclipse982nrRST, Dec-31-69 06:00 PM
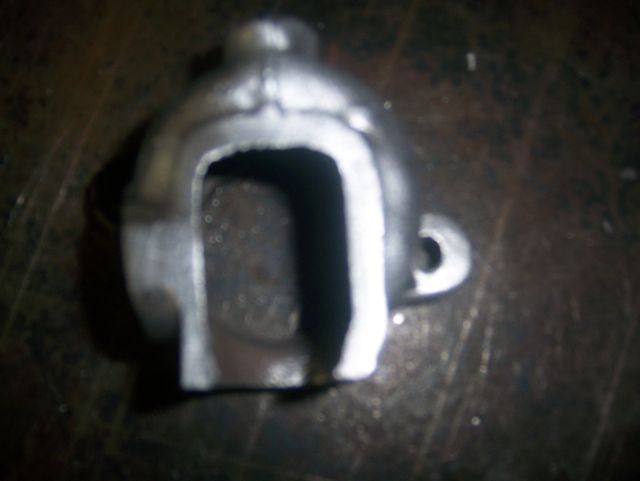
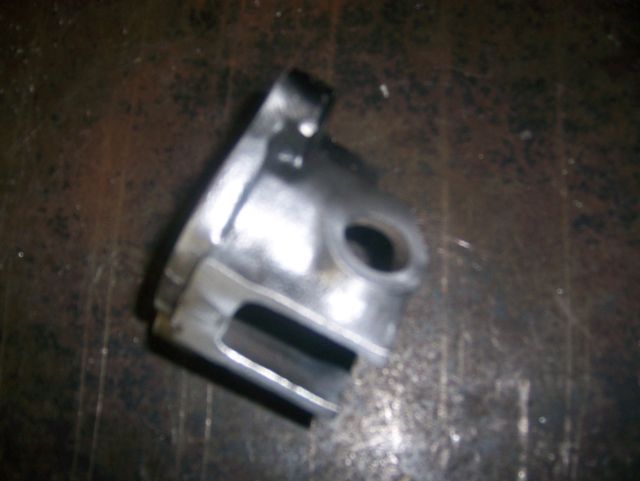
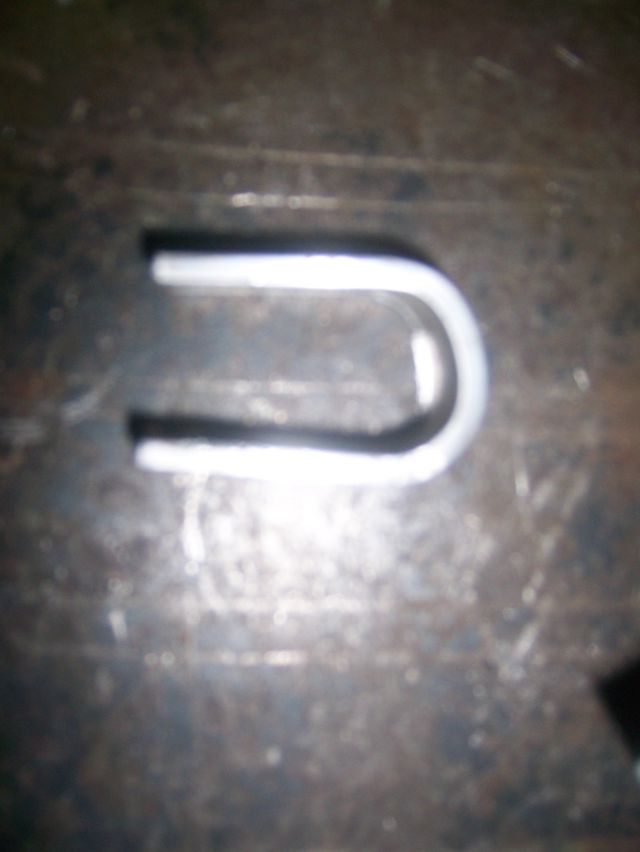
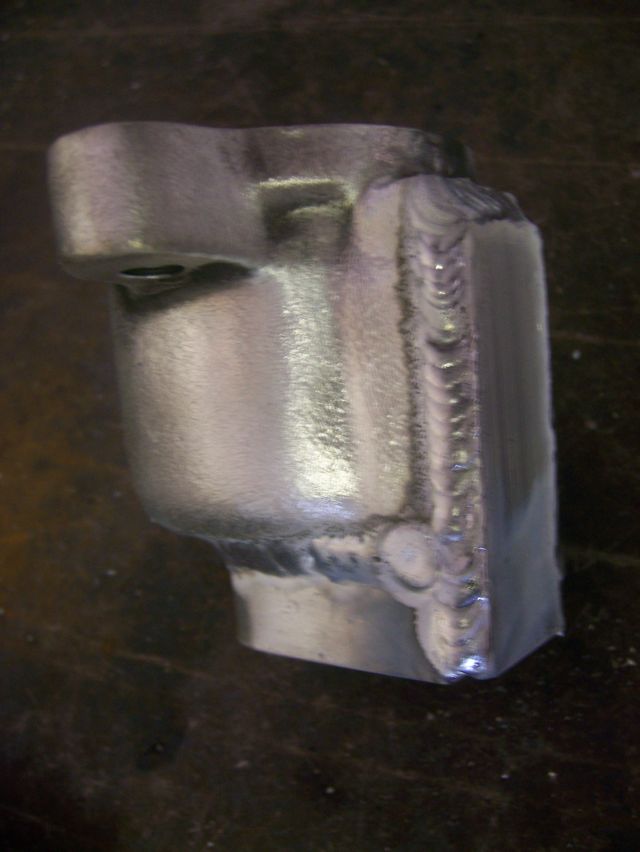
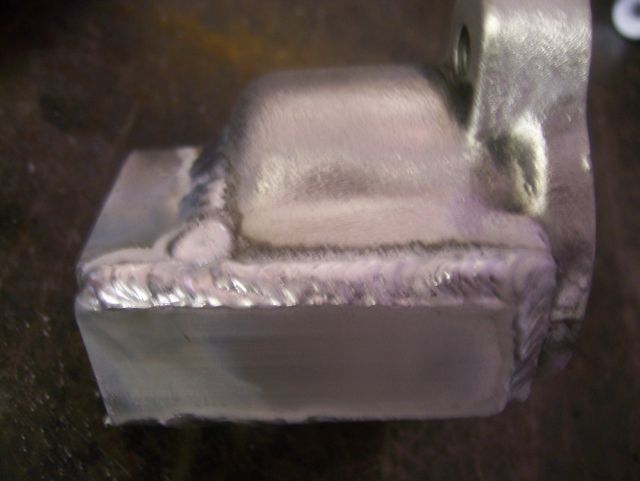
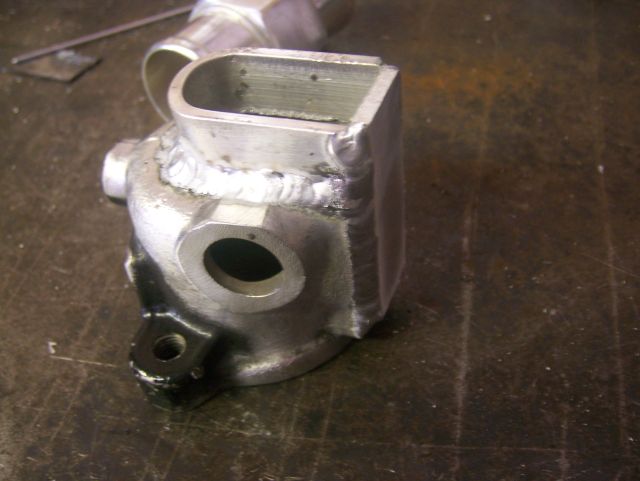
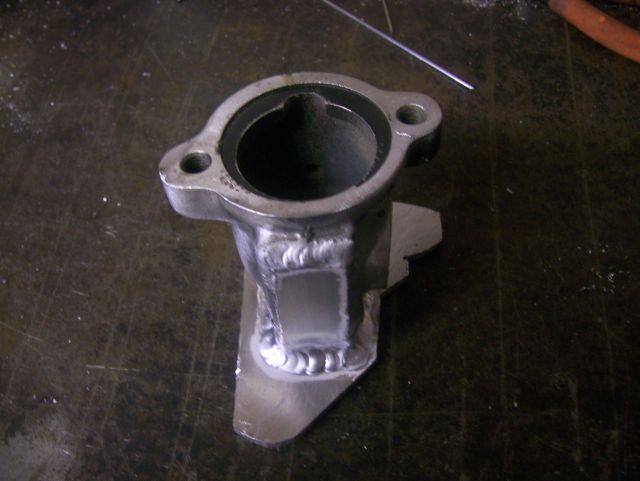
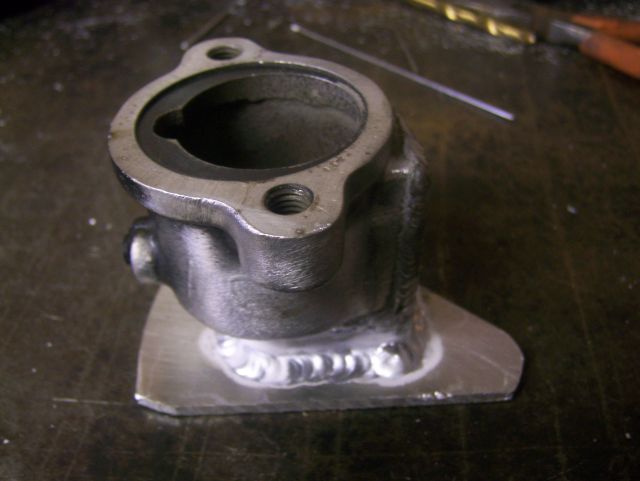
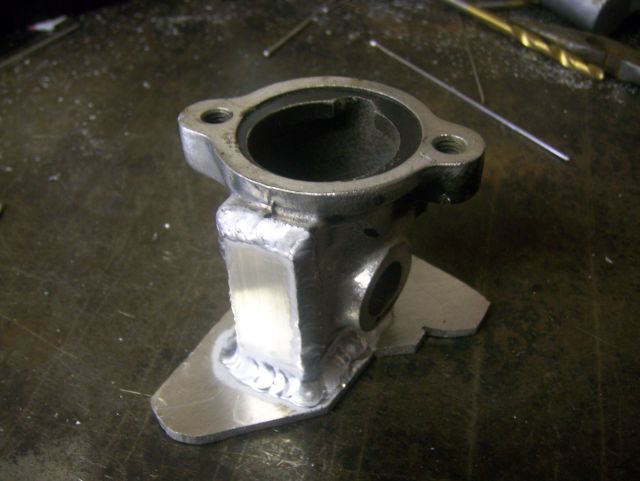
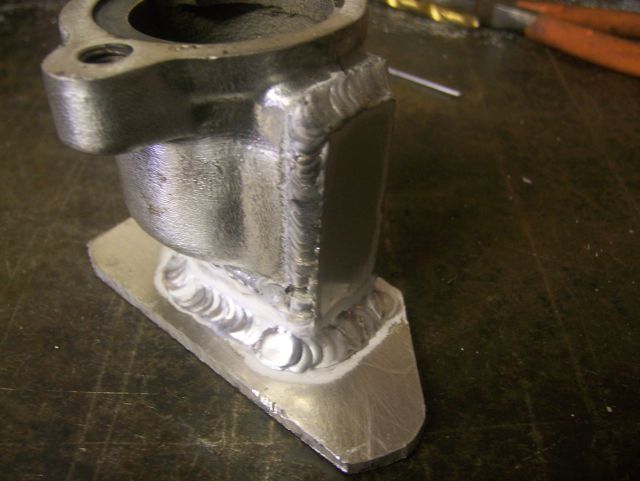
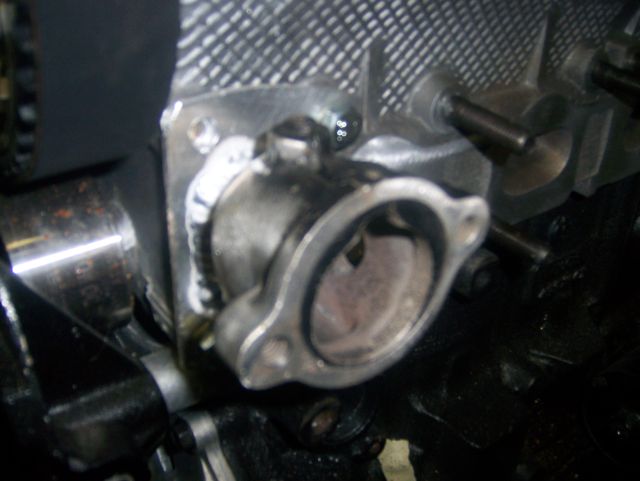
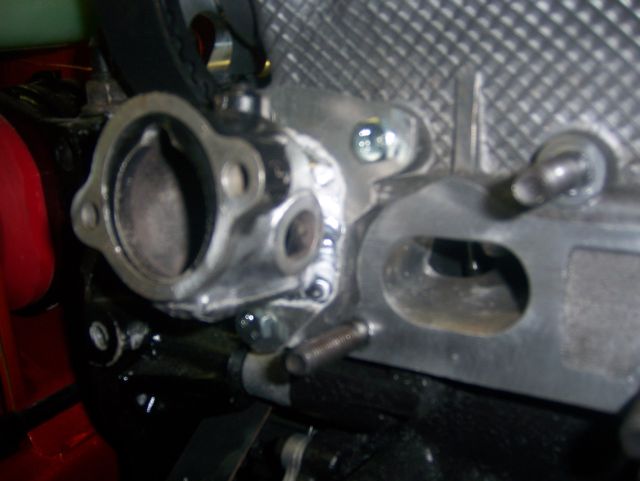
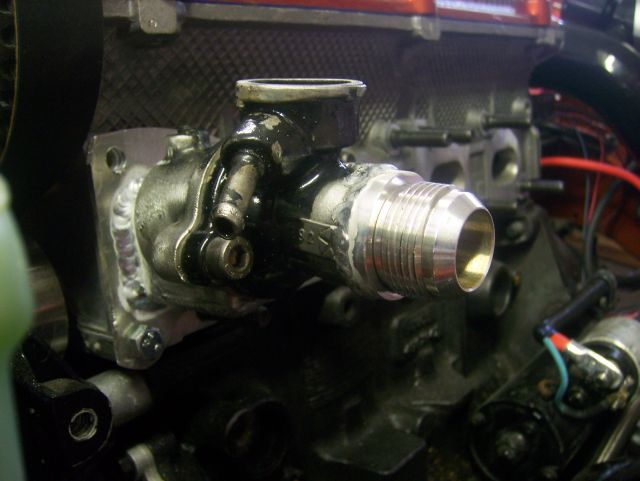
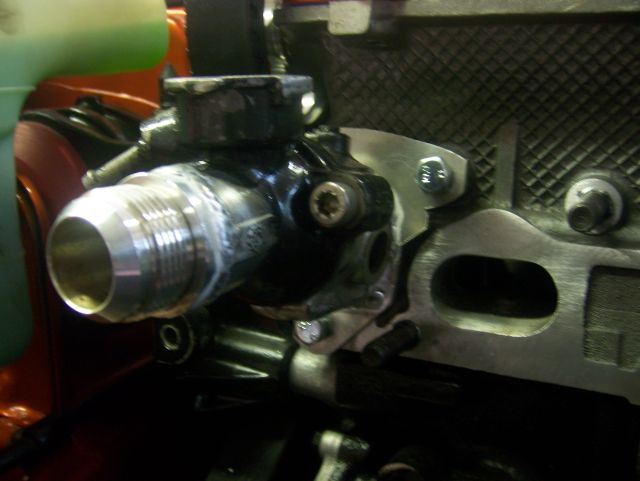
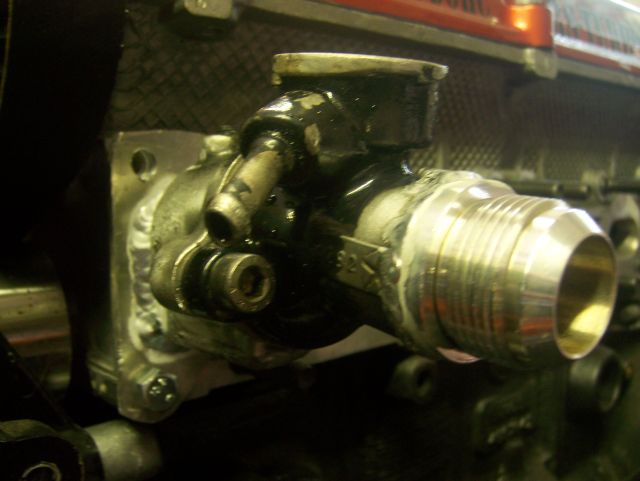
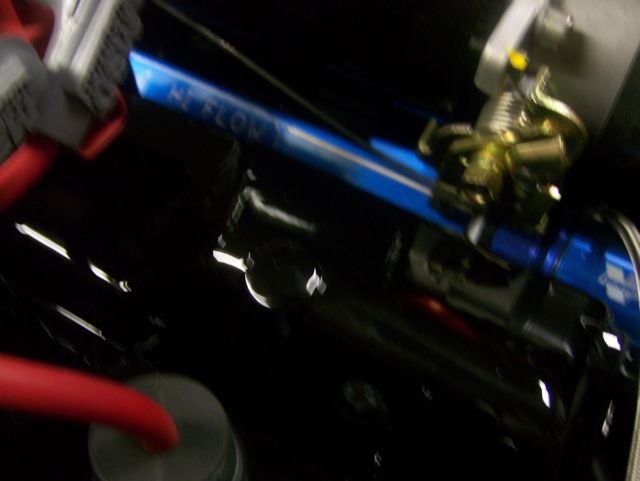
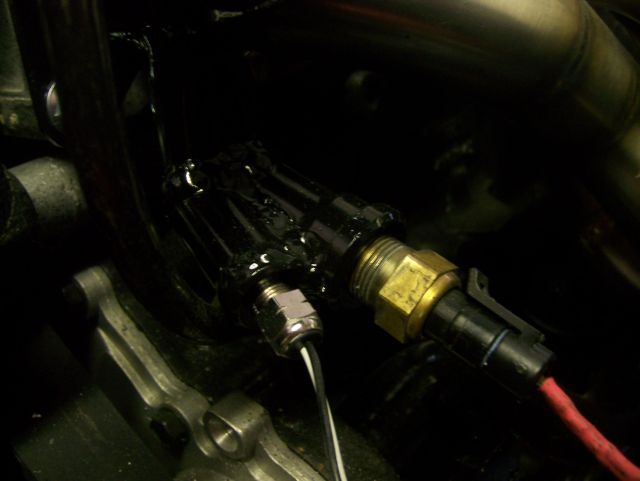
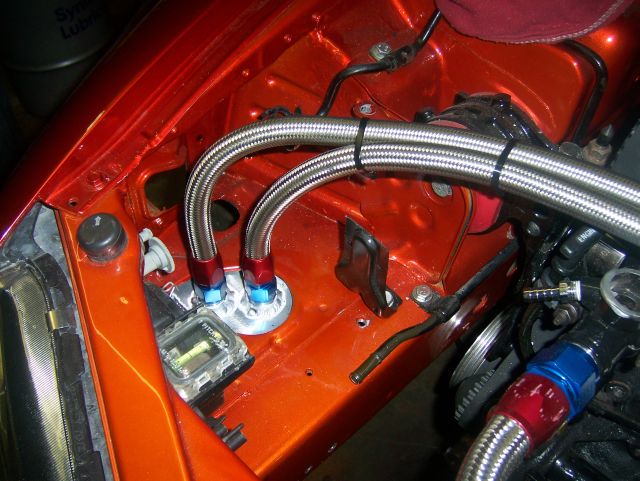
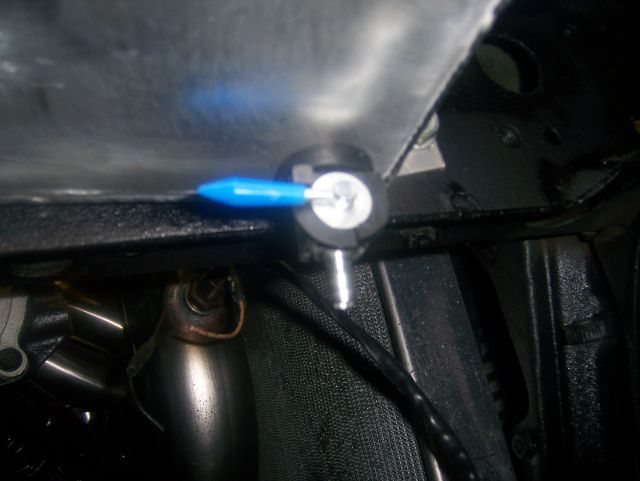
Got some extra time to start working on the project again this week. I was wanting to -16an upper and lower radiator hoses, and I want the thermostat housing about an inch lower then how it sits from the factory, so as you can see below, I modified the housing how I wanted it. The Coolant temp sensors for both MS and my ProSport gauge will have bungs welded into the radiator along the top.
![]() 
![]() 
![]() 
![]() 
![]() 
![]() 
![]() 
![]() 
![]() 
![]() 
![]() 
![]() 
![]() 
![]() 
![]() 
![]() 
![]() 
![]() 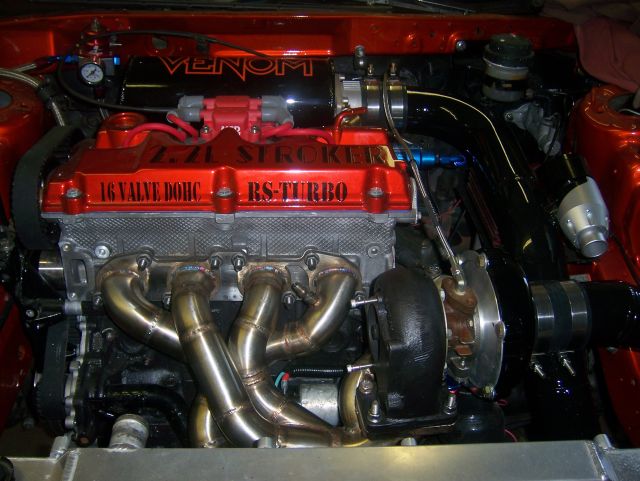
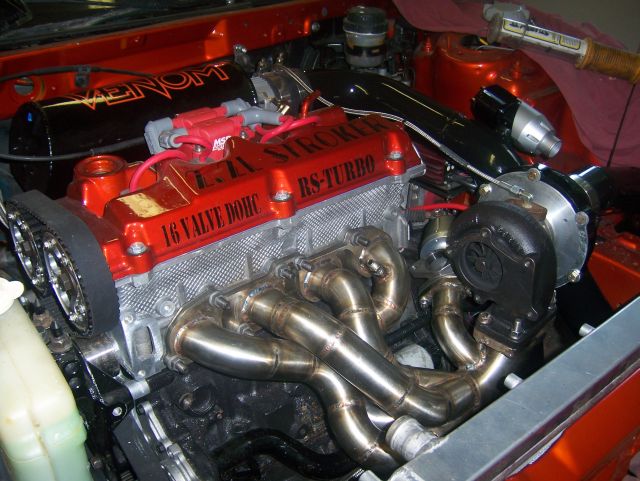
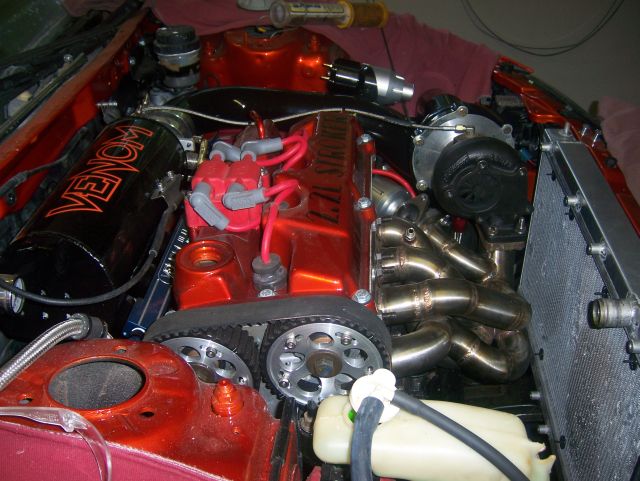
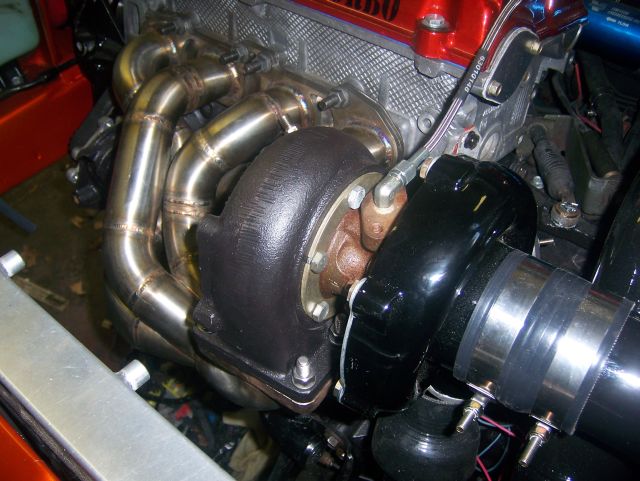
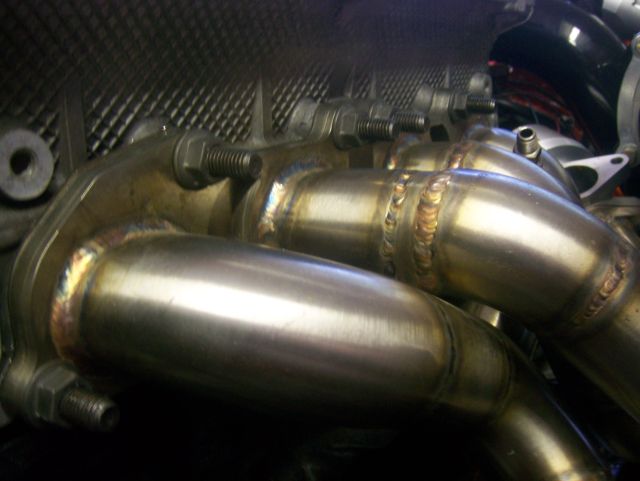
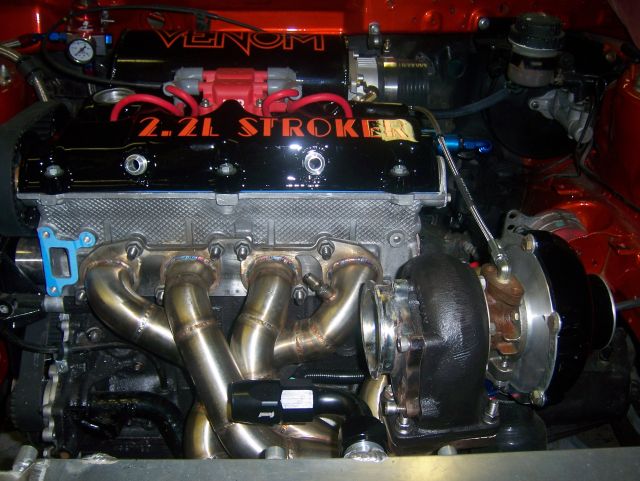
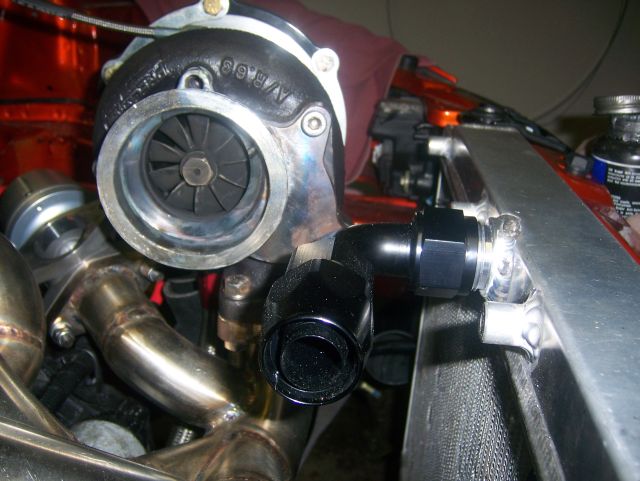
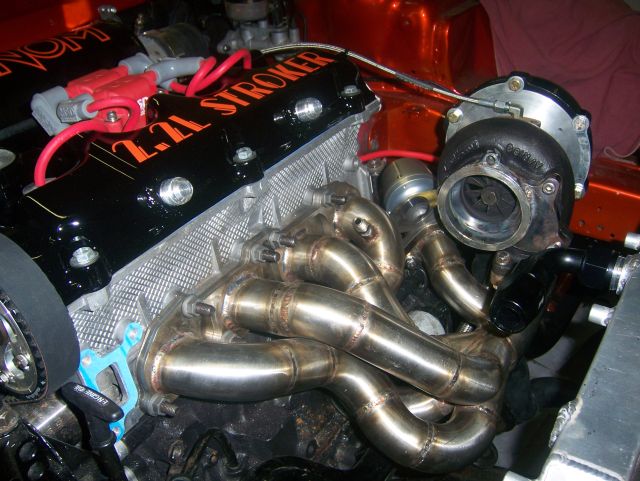
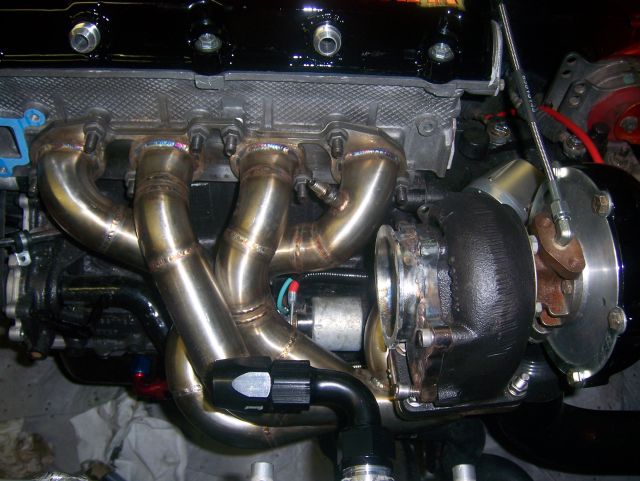
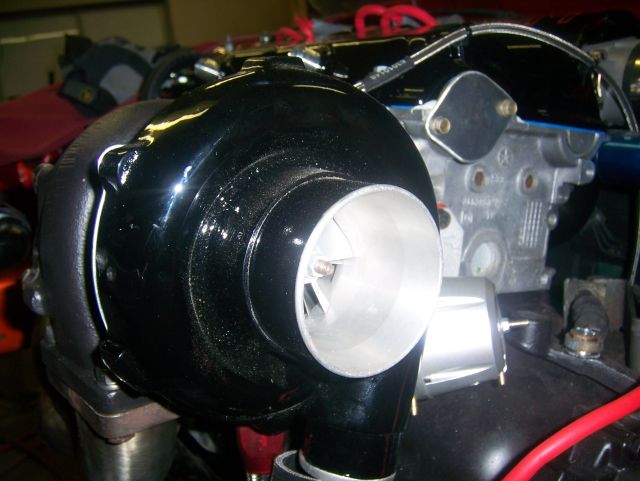
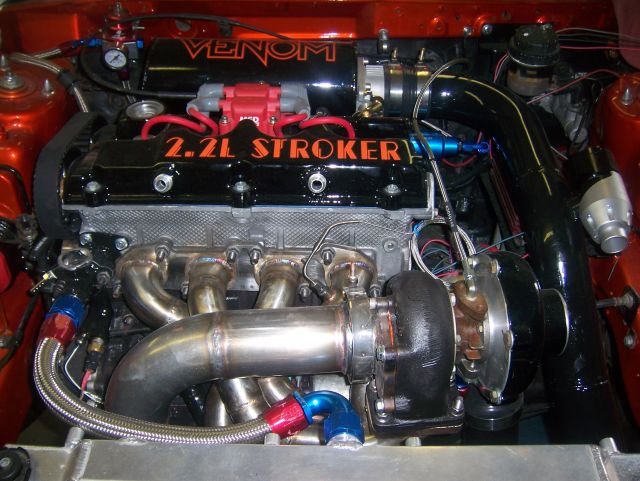
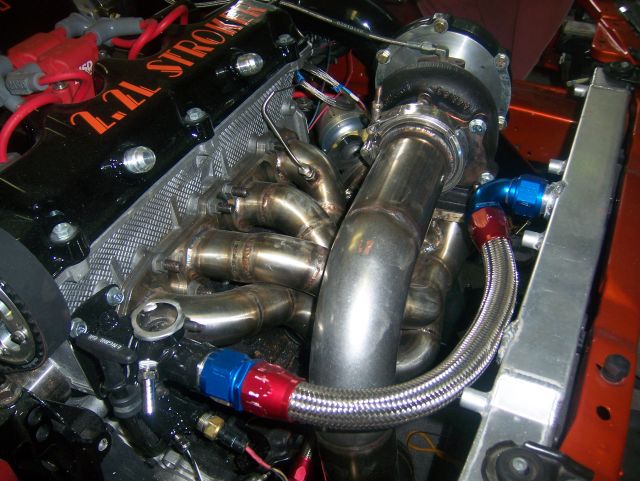
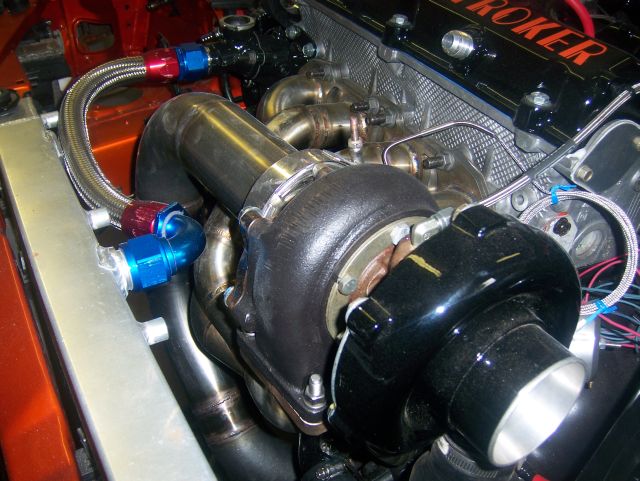
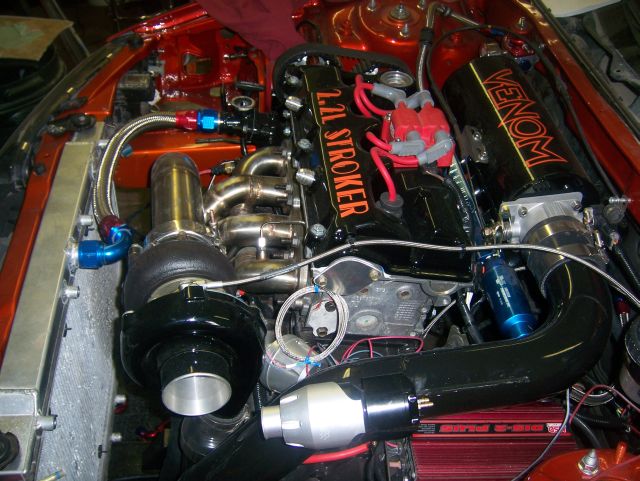
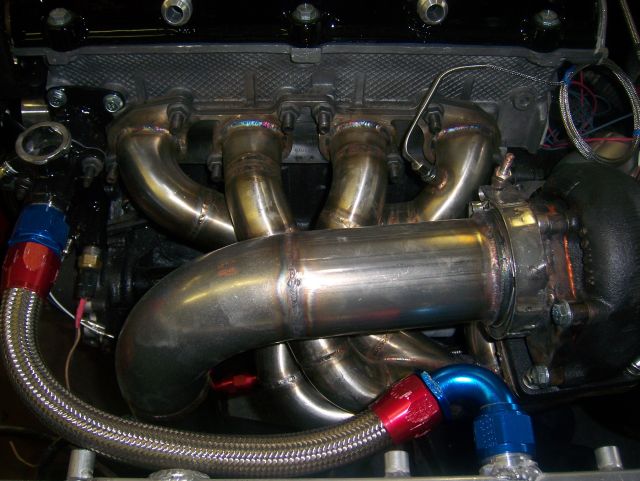
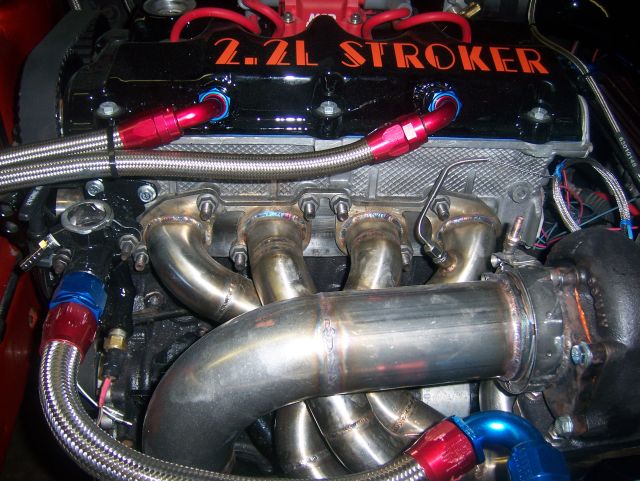
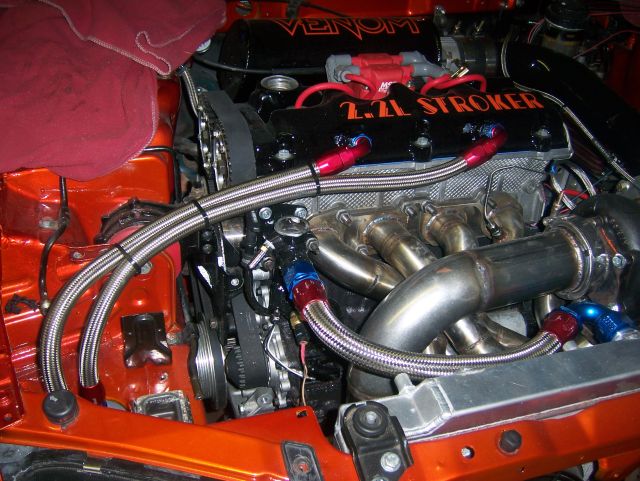
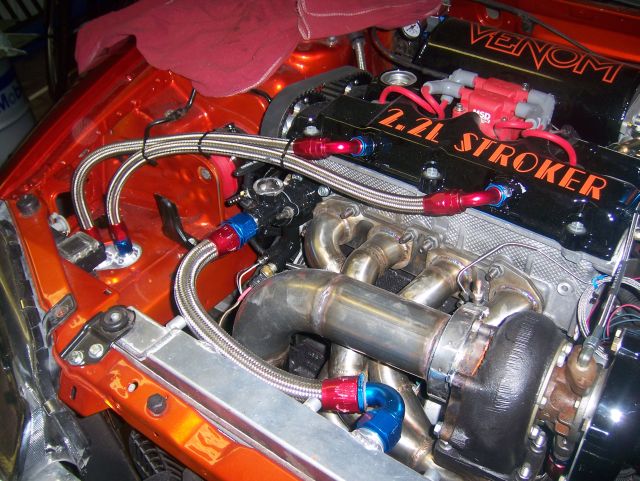
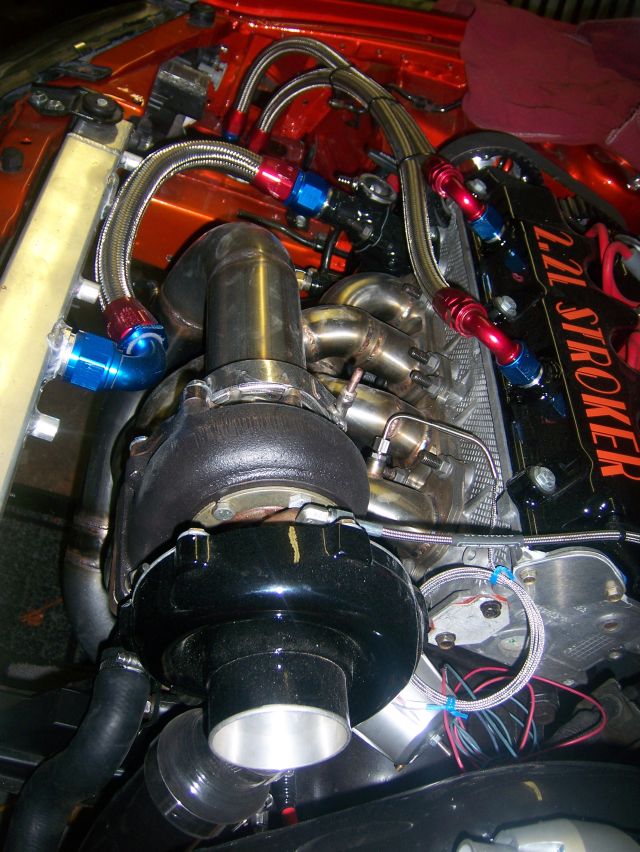
Not much other stuff done yet, got the manifold and turbo mounted back on. Also, added 10mm studs for the exhaust manifold. Got the turbo drain ran to the oil pan, finished painting the intercooler piping and mounted the BOV. Made a cam sensor block off plate and welded in some good old skateboard bearings for shifter bushings.
![]() 
![]() 
![]() 
![]() 
![]() 
![]() 
![]() 
![]() 
![]() 
![]() 
![]() 
|
126429, RE: Some progress with the 2.2L
Posted by CODE4, Dec-31-69 06:00 PM
Good shit bro! Love those welds.
|
126431, RE: Some progress with the 2.2L
Posted by 420agreenvilleSC, Dec-31-69 06:00 PM
grrrrrrrrrr. i really need to invest in welding. is that a dis-2 plus i see on ur battery tray???
|
126435, RE: Some progress with the 2.2L
Posted by eclipse982nrRST, Dec-31-69 06:00 PM
Originally posted by 420agreenvilleSC
grrrrrrrrrr. i really need to invest in welding. is that a dis-2 plus i see on ur battery tray???
Yes it is. And thanks for the compliments on my welding :)
|
126436, RE: Some progress with the 2.2L
Posted by Ebster1085, Dec-31-69 06:00 PM
Ill have to second the props on the welding. Nice work! DIS2 will be my next purchase..
|
126443, RE: Some progress with the 2.2L
Posted by Star Turbo Talon, Dec-31-69 06:00 PM
Looks good Mike.....You have a lot of contaminants in the welds, i would grab another housing and work on a back up piece. Chances are those welds will sweat coolant.
Great progress and its coming along. You have what? 2 months to produce 400WHP? I will put a/c in the garage so you dont work up too much of a sweat waxing my car!
|
126448, RE: Some progress with the 2.2L
Posted by eclipse982nrRST, Dec-31-69 06:00 PM
Originally posted by Star Turbo Talon
Looks good Mike.....You have a lot of contaminants in the welds, i would grab another housing and work on a back up piece. Chances are those welds will sweat coolant. Great progress and its coming along. You have what? 2 months to produce 400WHP? I will put a/c in the garage so you dont work up too much of a sweat waxing my car!
The housing was very clean when I welded it, the problem is that the housing doesnt weld like aluminum, more like plastic. It is the cheapest quality aluminum ever produced probably, haha.
It will be on the roads in a month Terry :thumbsup
|
126449, RE: Some progress with the 2.2L
Posted by Star Turbo Talon, Dec-31-69 06:00 PM
Be sure to explain the excuses to the coolant as you pour it in so it doesnt sweat from the porous welds!
|
126450, RE: Some progress with the 2.2L
Posted by MITSUracer123, Dec-31-69 06:00 PM
dang that looks good! Whats up with the shifter bushing? by that i mean how did u do that? mines shit and i always wondered if u can do something to fix it.
|
126453, RE: Some progress with the 2.2L
Posted by xcasbonx, Dec-31-69 06:00 PM
Nice Mike. Can't go wrong with a Bones Swiss skateboard bearing! :thumbsup
|
126454, RE: Some progress with the 2.2L
Posted by eclipse982nrRST, Dec-31-69 06:00 PM
Originally posted by xcasbonx
Nice Mike. Can't go wrong with a Bones Swiss skateboard bearing! :thumbsup
LMAO, I am surprised someone caught that...it was either the Bones Swiss, or my old Lucky 7's :)
And for the person above who asked about the bearings, I took four old skateboard bearings and tacked 2 of them together (so two go into each shifter cable) and pressed them into the shifter housing. Feels really smooth now.
|
126461, RE: Some progress with the 2.2L
Posted by DirtMegirt, Dec-31-69 06:00 PM
Mike,
Love the -16an fitting for the coolant! Just was wonderin' if you have any concerns about vibration with the placement of the fuel filter?
|
126462, RE: Some progress with the 2.2L
Posted by eclipse982nrRST, Dec-31-69 06:00 PM
Originally posted by DirtMegirt
Mike, Love the -16an fitting for the coolant! Just was wonderin' if you have any concerns about vibration with the placement of the fuel filter?
With a solid front mount and the three other Prothane mounts, the motor has little movement :)
|
126482, RE: Some progress with the 2.2L
Posted by Flipboi89, Dec-31-69 06:00 PM
FInally you update mike lol. Keep it up.
|
126501, RE: Some progress with the 2.2L
Posted by MITSUracer123, Dec-31-69 06:00 PM
thats awesome! i think ill use my Lucky 7s! I was always wondering if you could do that, i just didnt know if it would fit. That damn rubber piece in mine broke and it shifts like crap cuz of it.
|
126718, RE: Some progress with the 2.2L...7-18-09
Posted by eclipse982nrRST, Dec-31-69 06:00 PM
Got some more work done with the project this last weekend, so I thought I would share some pics.
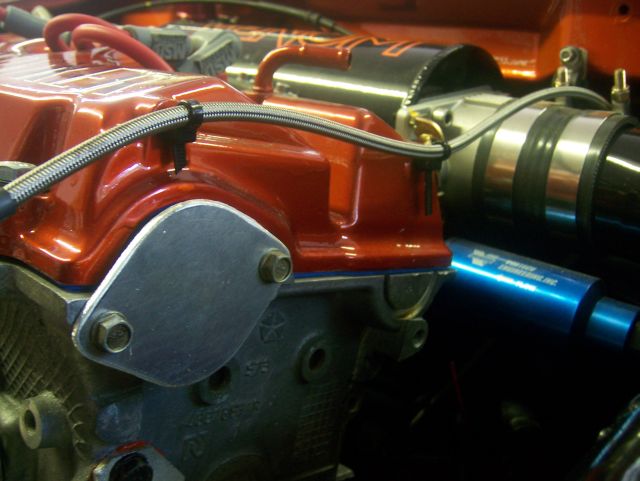
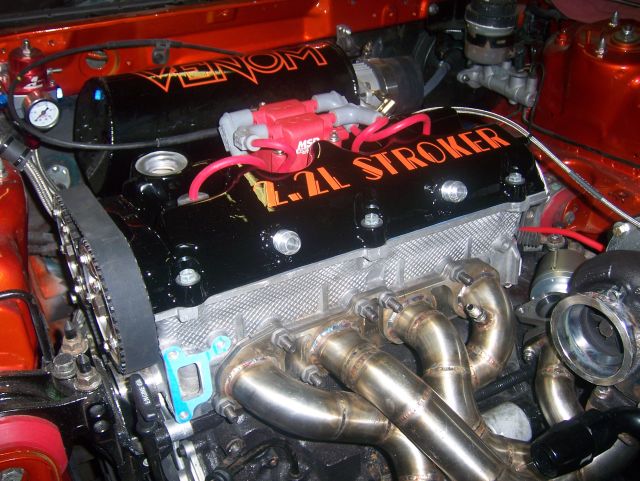
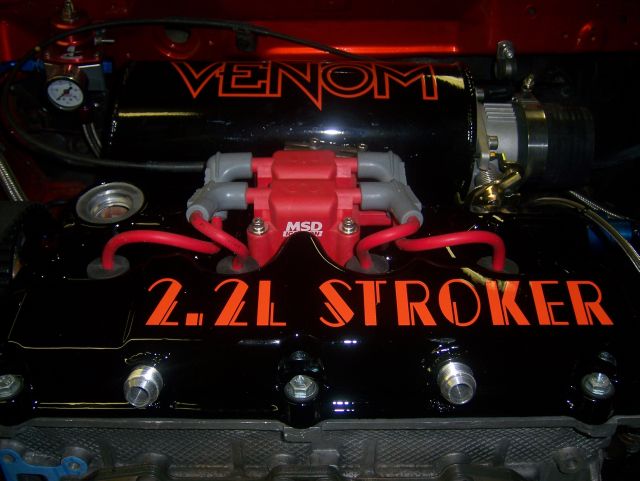
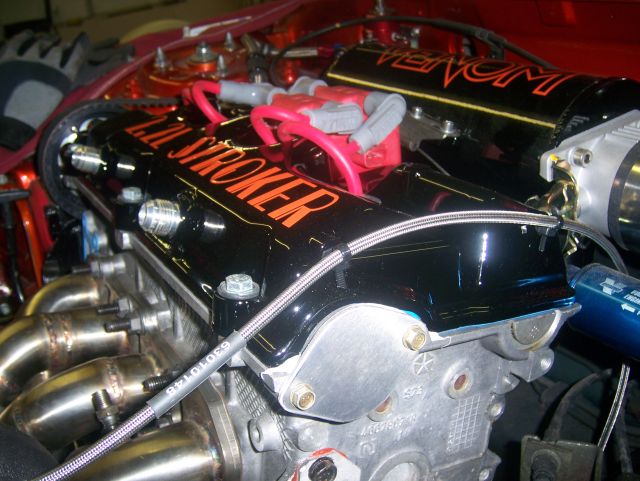
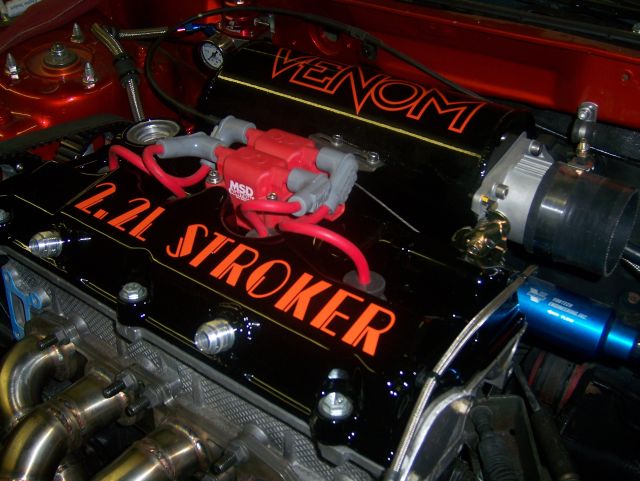
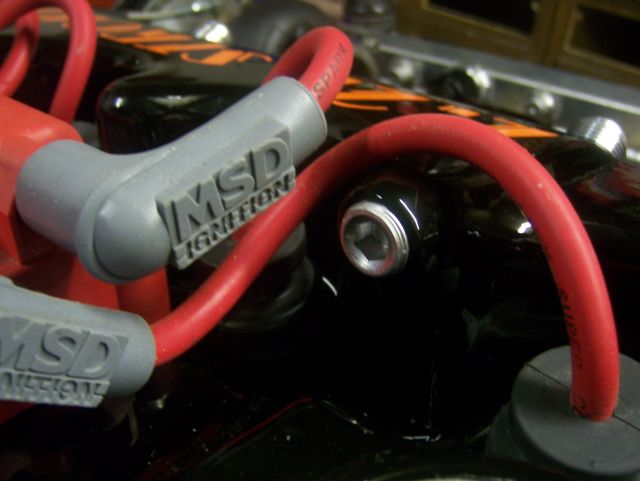
I did not care for the orange valve cover I had on the motor. So I stripped it down, welded in two -10 bungs for a breather can setup that is in the works, cut off and welded the stock breather pipe hole shut and flush, and cut off the stock straight piece for the PCV valve, tapped it with a 1/4 NPT thread and picked up a aluminum allen head cap from Summit and Capped it off. Also got some new spark plugs and got those put it with the coil and wires.
![]() 
![]() 
![]() 
![]() 
![]() 
![]() 
![]() 
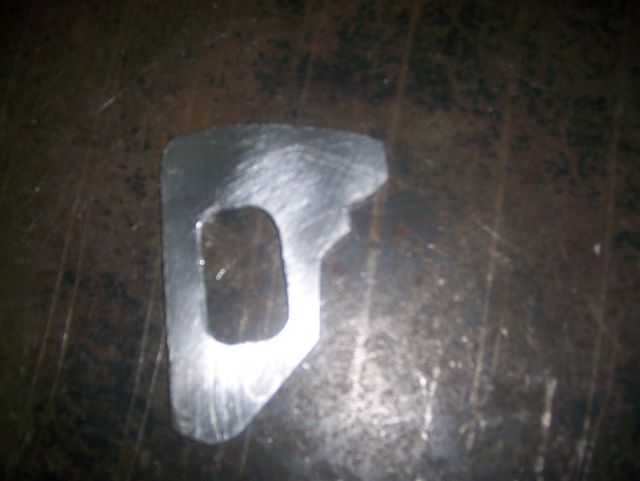
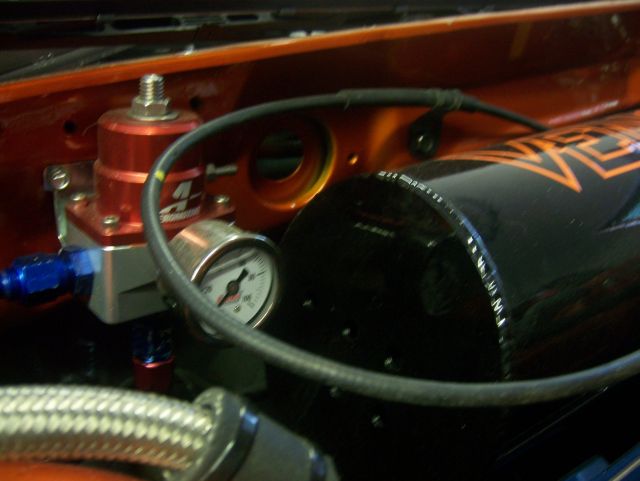
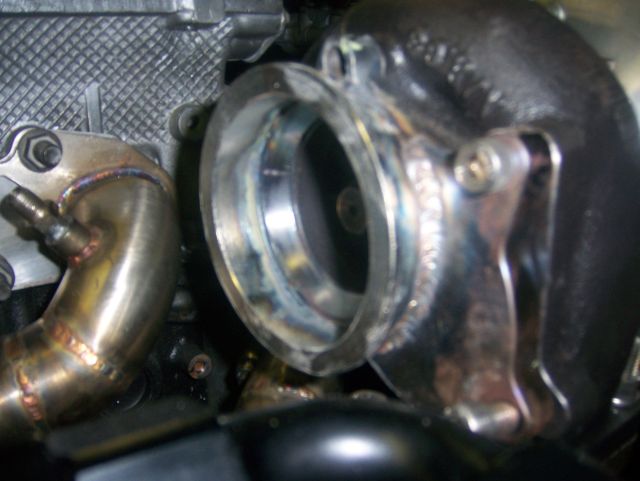
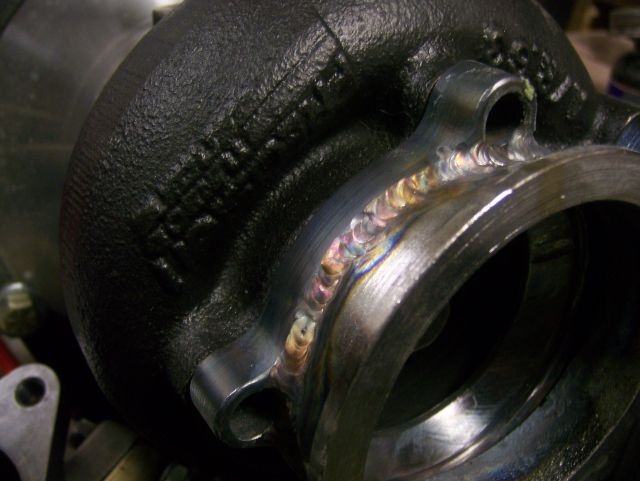
Also going to begin fabricating a new downpipe setup. Cut off my old flange from the downpipe. I picked up the flange itself from ATP last year, it is a nice 2.5 to 3 inch transition flange to use with a 3 inch downpipe. In my case, I wanted to use a 3" vband with my new downpipe, and did not want to spend more money on purchasing a new turbine housing or welding the vband flange to the housing itself. So I took the flange which actually was about 3-1/4" and welded it to the 5 bolt flange, came out pretty good. I also cut off the original housing for the upper radiator hose on my Fluidyne radiator and made a piece to cap it off. I welded that in and then picked a -16AN weld in bung and welded the bung into the middle of the radiator. This was only done to give me a little but more clearance room for my 3 inch downpipe which you will see in couple of days.
![]() 
![]() 
![]() 
![]() 
![]() 
![]() 
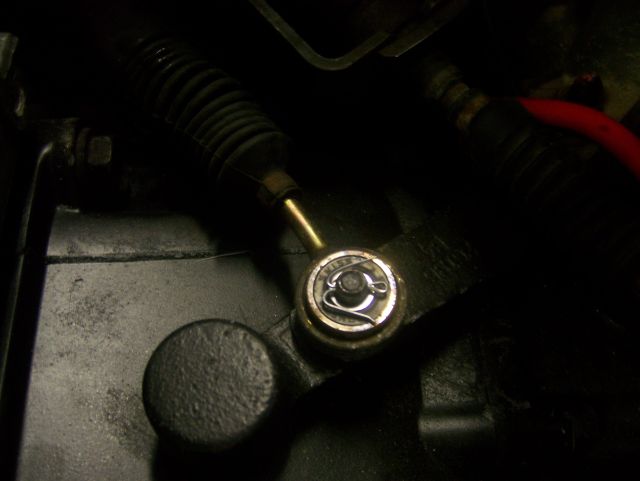
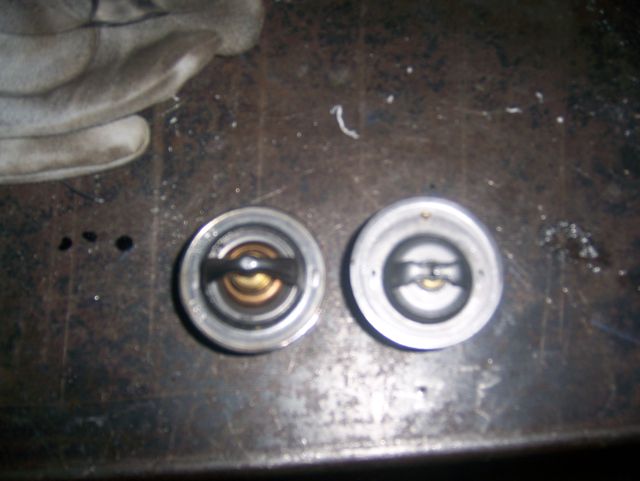
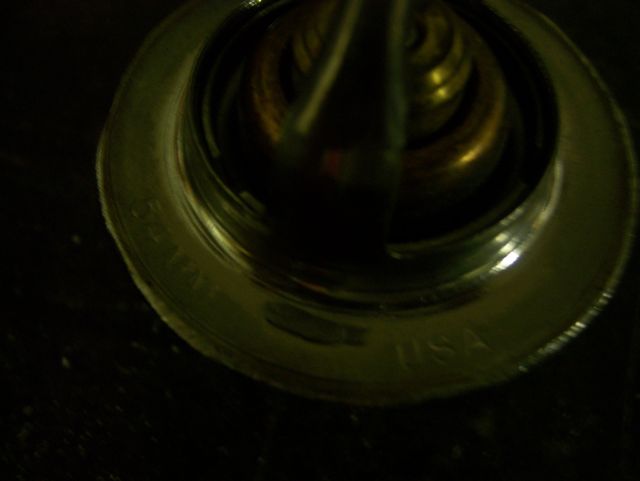
Lastly, I did not feel like buying the 160* thermostat from Howell and waiting and paying shipping fees for it. Since I live literally 2 miles from Summit Racing, I went and got a 54mm 160* tstat for a big block Chevy. Our tstat measures in at 46mm. I bought the tstat $9 including tax. I simply trimmed it down to 46mm with a die grinder and burr bit. Fits good now :)
![]() 
![]() 
Stay tuned in every weekend for more progress and pics :)
EDIT: Also forgot to mention that I got all the front suspension put back together and axles finally put back in. I will be bringing in the front wheels/tires tomorrow to our dealership to install nitrogen in the tires, and rebalance the wheels.
|
126720, RE: Some progress with the 2.2L
Posted by Nightfall, Dec-31-69 06:00 PM
Looks great man, like always! The new valve cover looks better too :thumbsup
...so when are you giving out free welding lessons again?? lol
|
126722, RE: Some progress with the 2.2L
Posted by eclipse982nrRST, Dec-31-69 06:00 PM
Originally posted by Nightfall
Looks great man, like always! The new valve cover looks better too :thumbsup ...so when are you giving out free welding lessons again?? lol
Thanks, I like the valve cover 50 times better.
I am no professional at welding. I simply bought a welder and learned on my own. Although, I did read the Tig Welding for Dummies book that came with the welder :) Anytime anyone wants to stop over, they are welcome to practice with my equipment.
|
126725, RE: Some progress with the 2.2L
Posted by whtclipse98, Dec-31-69 06:00 PM
I love the valve cover setup and at first I was wondering on how you were going to put the line from your thermostat housing to the radiator, than saw in the new pics how you were going to do it. Why did you op for using the turbo radiator versus a non-turbo one?
|
126728, RE: Some progress with the 2.2L
Posted by eclipse982nrRST, Dec-31-69 06:00 PM
Originally posted by whtclipse98
I love the valve cover setup and at first I was wondering on how you were going to put the line from your thermostat housing to the radiator, than saw in the new pics how you were going to do it. Why did you op for using the turbo radiator versus a non-turbo one?
Mainly because I did not want to try to sell my radiator/pusher fans that already installed. Not many people like buying a used radiator, atleast speaking for myself, I would not.
|
126792, RE: Some progress with the 2.2L
Posted by Flipboi89, Dec-31-69 06:00 PM
Anymore updates? Youve been in this rebuild process since ive joined 2gnt lol.
|
126795, RE: Some progress with the 2.2L
Posted by whtclipse98, Dec-31-69 06:00 PM
Oh sorry I guess I should have been a little more specific. Why did you go with the turbo radiator in the first place?
|
127626, RE: Some progress with the 2.2L
Posted by eclipse982nrRST, Dec-31-69 06:00 PM
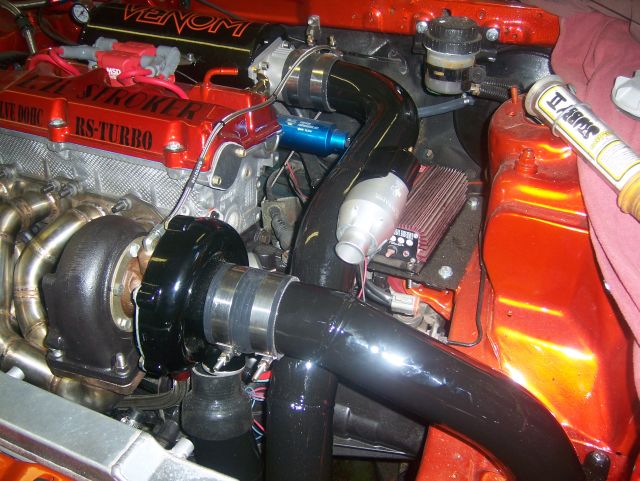
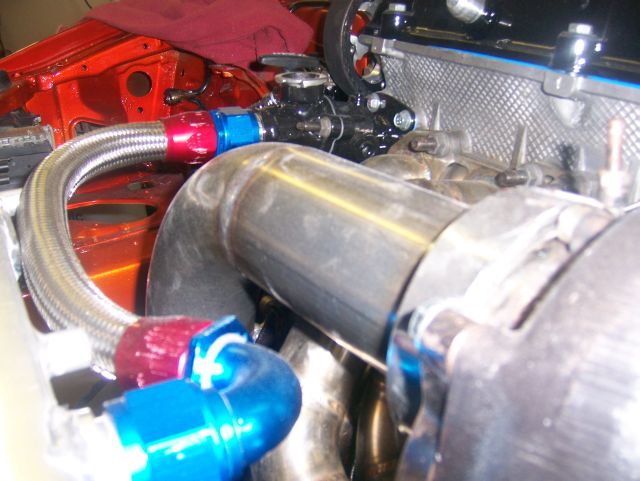
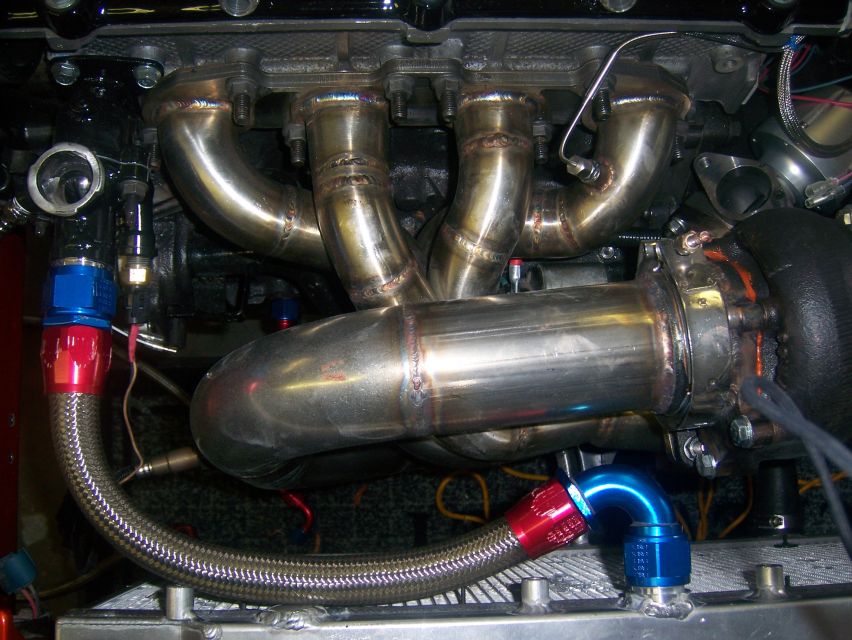
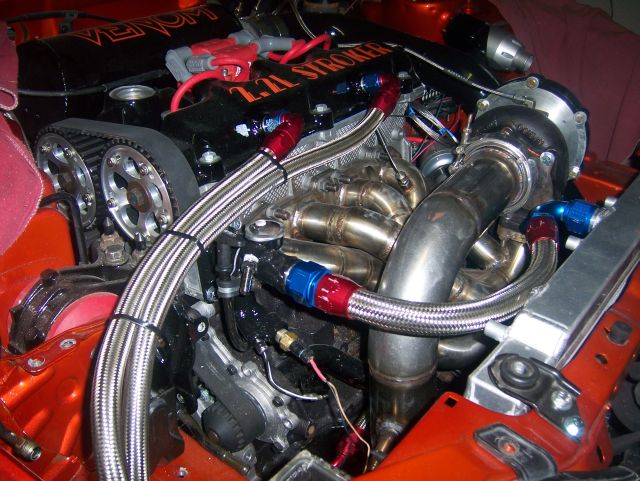
Finished 3 inch downpipe and upper -16AN radiator hose and modidied tstat housing.
![]() 
![]() 
![]() 
![]() 
![]() 
![]() 
![]() 
![]() 
![]() 
|
127629, RE: Some progress with the 2.2L
Posted by 420agreenvilleSC, Dec-31-69 06:00 PM
looks phenomenal. http://www.2gnt.com/graphics/48417.JP G, what picture is that of? i cant really tell.
also, i bet your starter is a PITA to get to now, isnt it
|
127630, RE: Some progress with the 2.2L
Posted by eclipse982nrRST, Dec-31-69 06:00 PM
Originally posted by 420agreenvilleSClooks phenomenal. http://www.2gnt.com/graphics/48417.JP G, what picture is that of? i cant really tell. also, i bet your starter is a PITA to get to now, isnt it
Yes, the starter is a pain in the dick to get to...
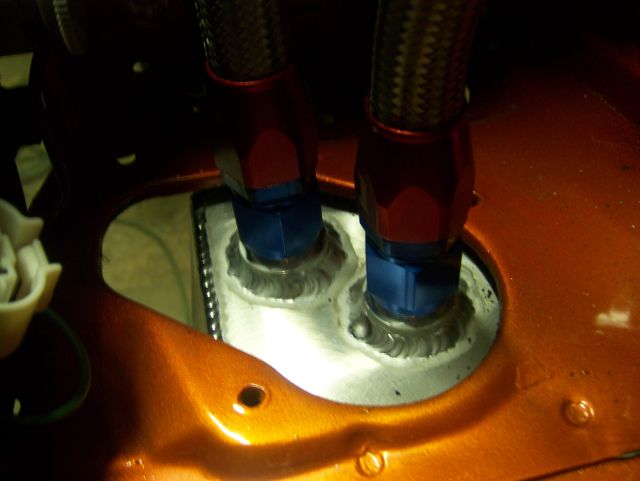
That picture is the thermostat housing I made/fabricated from the stock housing. It is a piece of one inch aluminum tube coming straight down out of the housing and teeing off into two for the MSnS CT sensor and the ProSport water temp gauge...
|
127631, RE: Some progress with the 2.2L
Posted by Cyexmaster, Dec-31-69 06:00 PM
You better coat and wrap the mani and down pipe... if not you will get high coolant temps.....
Looks real nice Mike! ;)
|
127633, RE: Some progress with the 2.2L
Posted by CODE4, Dec-31-69 06:00 PM
Originally posted by Cyexmaster
You better coat and wrap the mani and down pipe... if not you will get high coolant temps..... Looks real nice Mike! ;)
Not necessarily.
|
127635, RE: Some progress with the 2.2L
Posted by eclipse982nrRST, Dec-31-69 06:00 PM
Originally posted by CODE4Originally posted by Cyexmaster You better coat and wrap the mani and down pipe... if not you will get high coolant temps..... Looks real nice Mike! ;) Not necessarily.
No I wont. Should have little to do with higher coolant temps.
Keep in mind I have a vented hood. Also, that was the purpose of using a thick stainless steel braided radiator hose over the stock rubber hose that would have been a lot closer in location to the downpipe.
|
127640, RE: Some progress with the 2.2L
Posted by Cyexmaster, Dec-31-69 06:00 PM
still think you could benefit a lot from wraping all that... will drop the under hood temp a lot...Just my .02
|
127641, RE: Some progress with the 2.2L
Posted by eclipse982nrRST, Dec-31-69 06:00 PM
Originally posted by Cyexmaster
still think you could benefit a lot from wraping all that... will drop the under hood temp a lot...Just my .02
It wouldnt make much of a difference...I have a hood that has a huge center vent like an evo, and then 3 other vents along the sides...not much more to do to lower under hood temps, lol.
|
127642, RE: Some progress with the 2.2L
Posted by 420agreenvilleSC, Dec-31-69 06:00 PM
hey, at least you don't look like a fuckn camaro wannabe
|
127651, RE: Some progress with the 2.2L
Posted by eclipse982nrRST, Dec-31-69 06:00 PM
How much more venting would you like?

|
127653, RE: Some progress with the 2.2L
Posted by 420agreenvilleSC, Dec-31-69 06:00 PM
THIS MUCH VENTING!!!

|
127654, RE: Some progress with the 2.2L
Posted by Cyexmaster, Dec-31-69 06:00 PM
Nice pics!
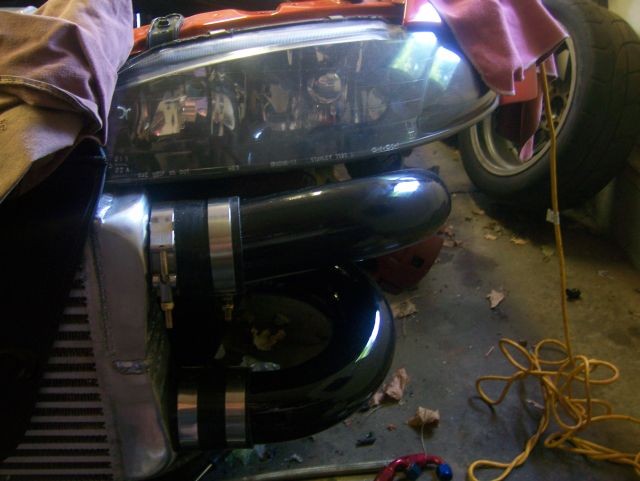
I wanna finish mine sooo bad,fmic's look great on our cars!
|
127725, RE: Some progress with the 2.2L
Posted by eclipse982nrRST, Dec-31-69 06:00 PM
More...
![]() 
![]() 
![]() 
![]() 
![]() 
![]() 
![]() 
![]() 
![]() 
![]() 
![]() 
![]() 
![]() 
![]() 
![]() 
![]() 
![]() 
![]() 
![]() 
![]() 
![]() 
![]() 
![]() 
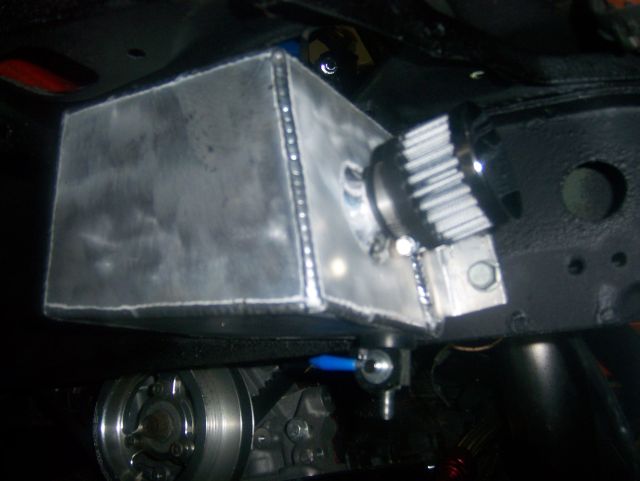
EDIT: Might as well edit this post before I get blown up about it...yes, there will be a one inch air filter to vent the can. It is not fully done and nothing will be done for much longer since I am in the process or possibly moving out of the house and into a new one. I installed it last night about 1 am when I couldnt sleep last night, just to test fit everything :)
|
127730, RE: Some progress with the 2.2L
Posted by bullettdsm, Dec-31-69 06:00 PM
That does look really sharp, Mike. I need to set-up my venting for the turbo and just haven't gotten around to it. I like the location of the box (and the box itself). She looks real purty so far.
|
127732, RE: Some progress with the 2.2L
Posted by dougie2, Dec-31-69 06:00 PM
Just a suggestion, Mike... you may want to put a drain cock on the catch can so you can drain it without removing it from the car. Looks real good!
|
127733, RE: Some progress with the 2.2L
Posted by eclipse982nrRST, Dec-31-69 06:00 PM
Originally posted by dougie2
Just a suggestion, Mike... you may want to put a drain cock on the catch can so you can drain it without removing it from the car. Looks real good!
Good thinking Doug. I have something in the tool box I could use :)
|
127743, RE: Some progress with the 2.2L
Posted by dalesmitsu, Dec-31-69 06:00 PM
Would you be making and selling these custom catch can, great job.
|
127749, RE: Some progress with the 2.2L
Posted by eclipse982nrRST, Dec-31-69 06:00 PM
Originally posted by dalesmitsu
Would you be making and selling these custom catch can, great job.
I will if you want one.
|
128020, Aluminum battery box and catch can
Posted by eclipse982nrRST, Dec-31-69 06:00 PM
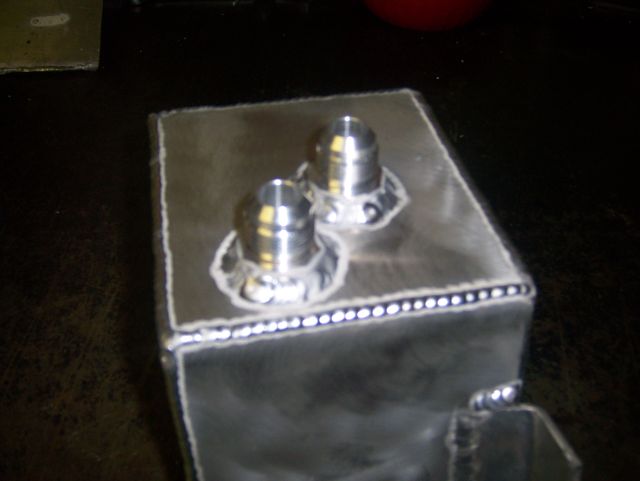
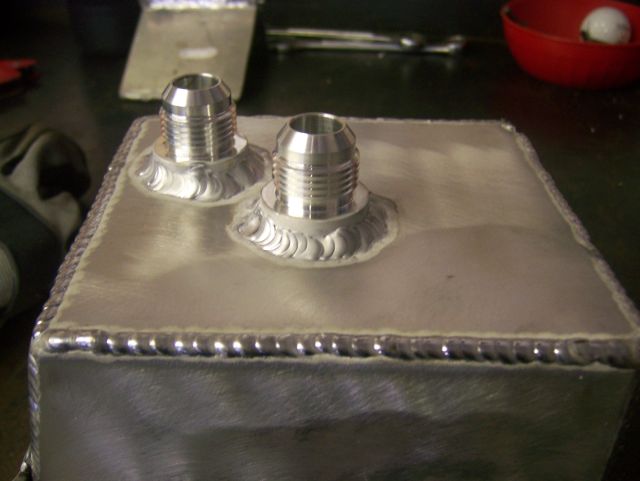
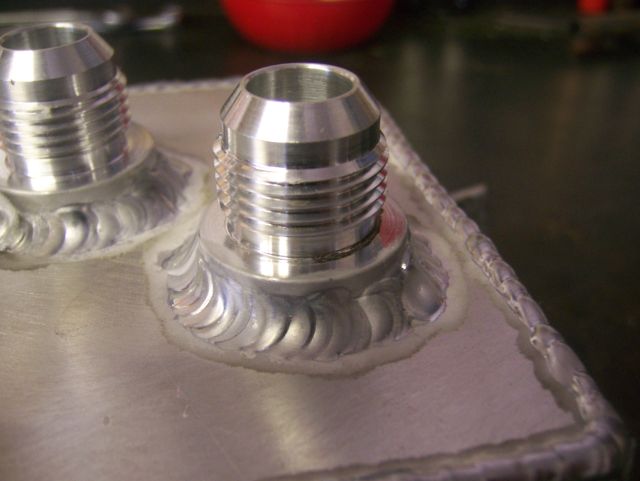
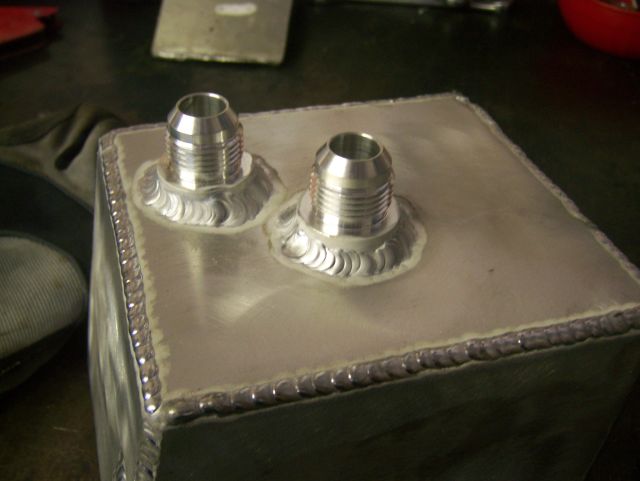
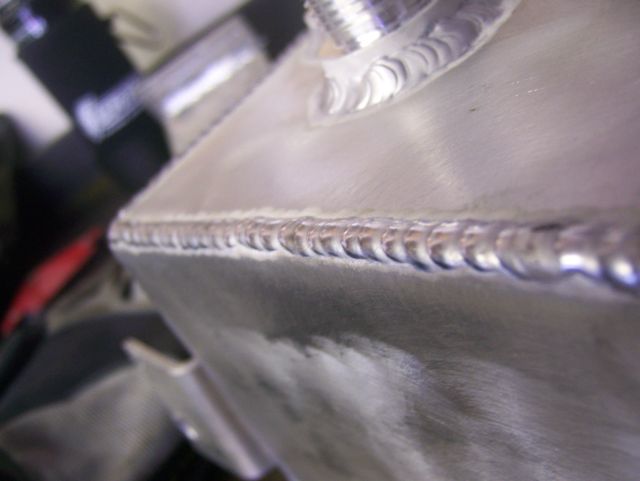
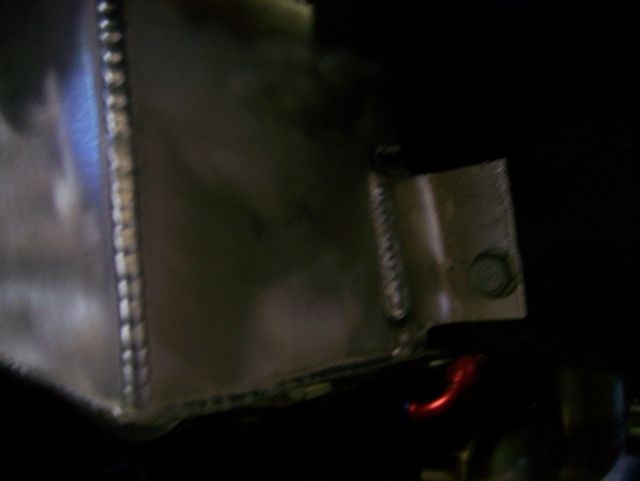
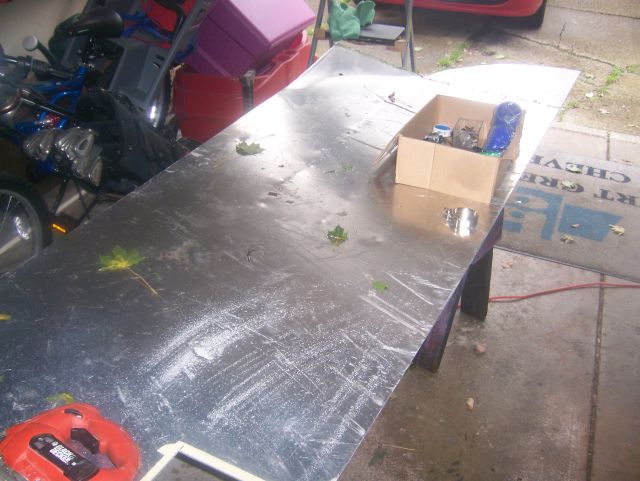
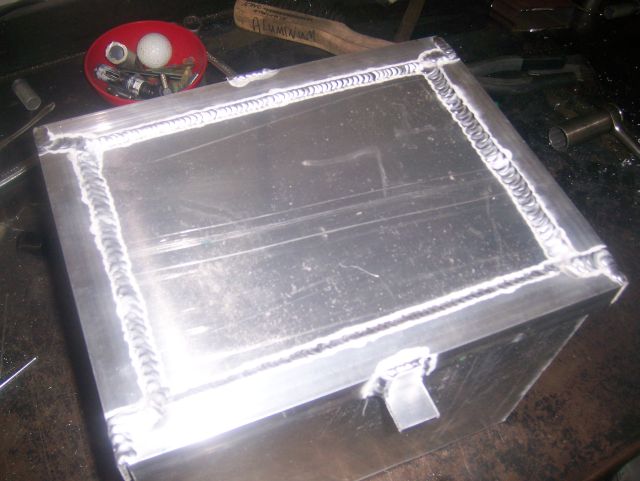
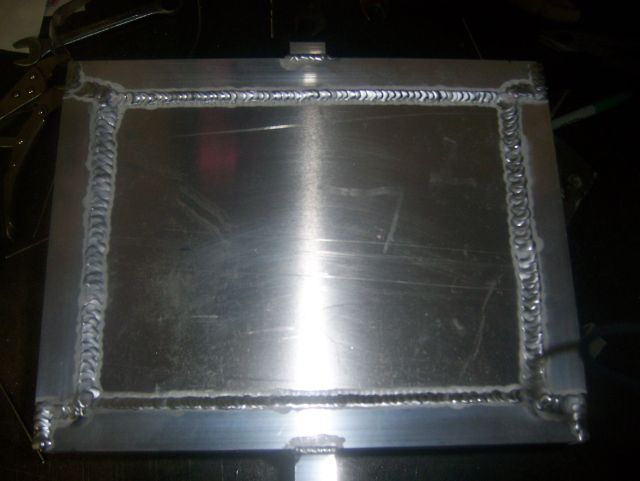
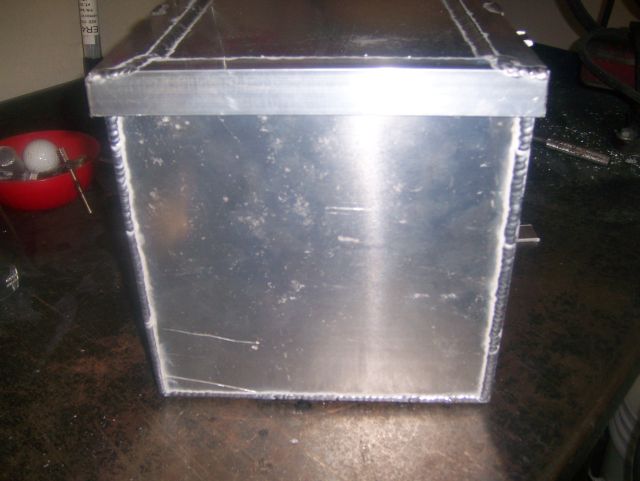
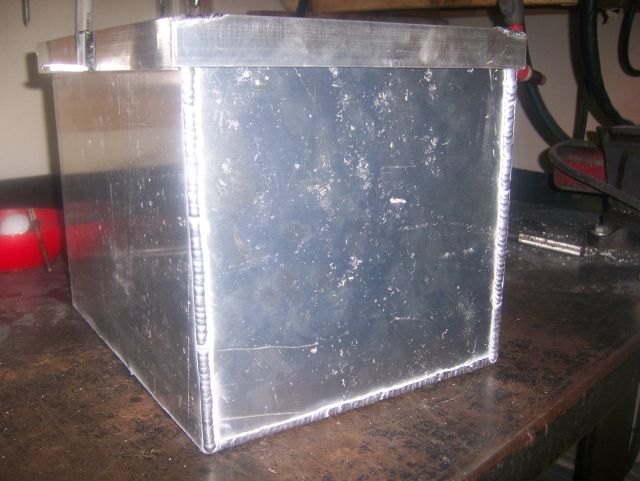
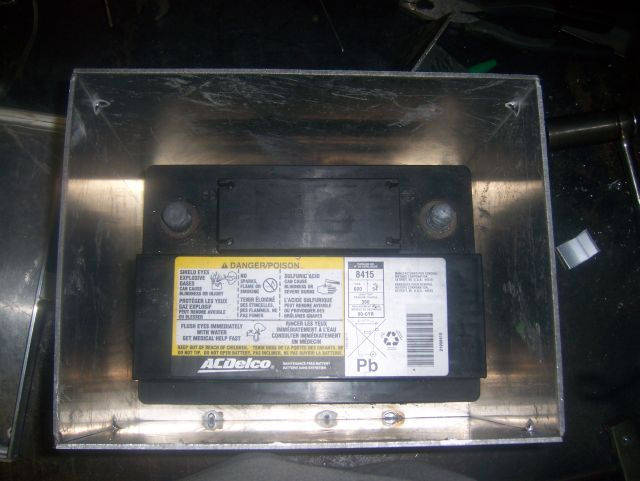
Scored a huge sheet of 1/4" Aluminum from my work for free last weekend, they are doing a shit load of reconstruction and the owner said I could have it...So off to town I went making shit. Started the battery box that will be mounted in the spare tire well and finished the catch can setup as you can see below.
![]() 
![]() 
![]() 
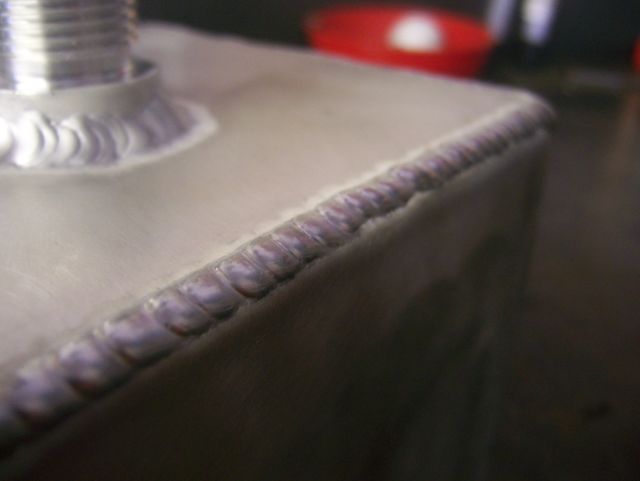
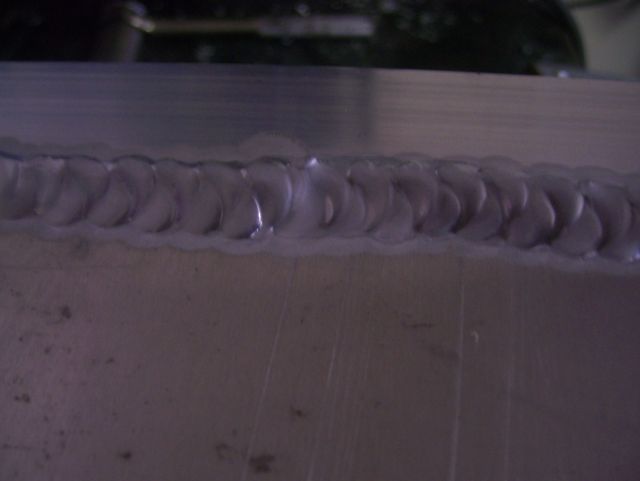
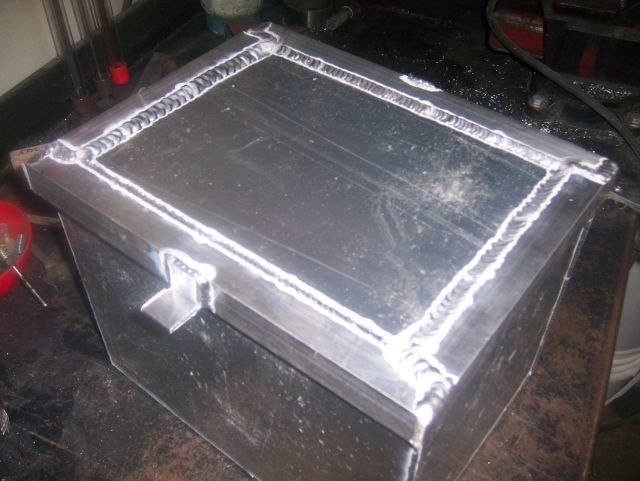
Stack those dimes..
![]() 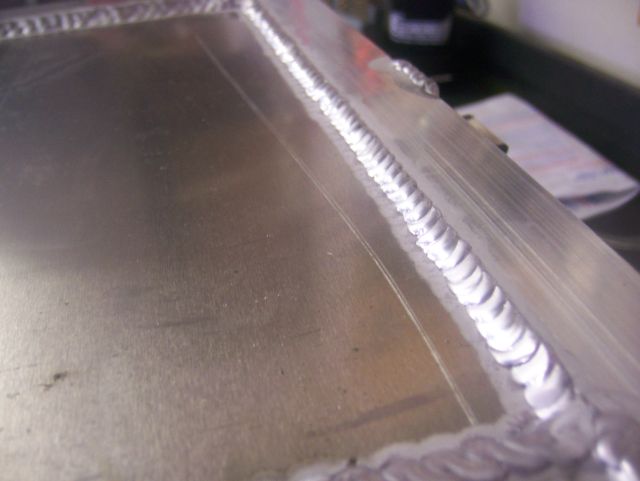
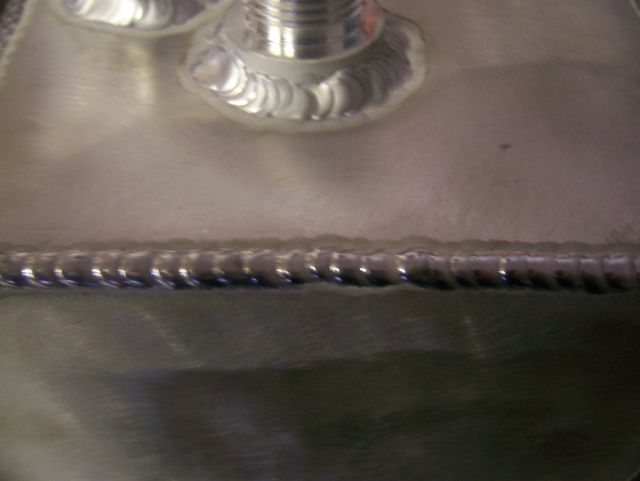
Not too sure what this technique is called, but I watched a video on youtube awhile back of this guy doing it, so I figured I would give it a try.
![]() 
![]() 
![]() 
![]() 
![]() 
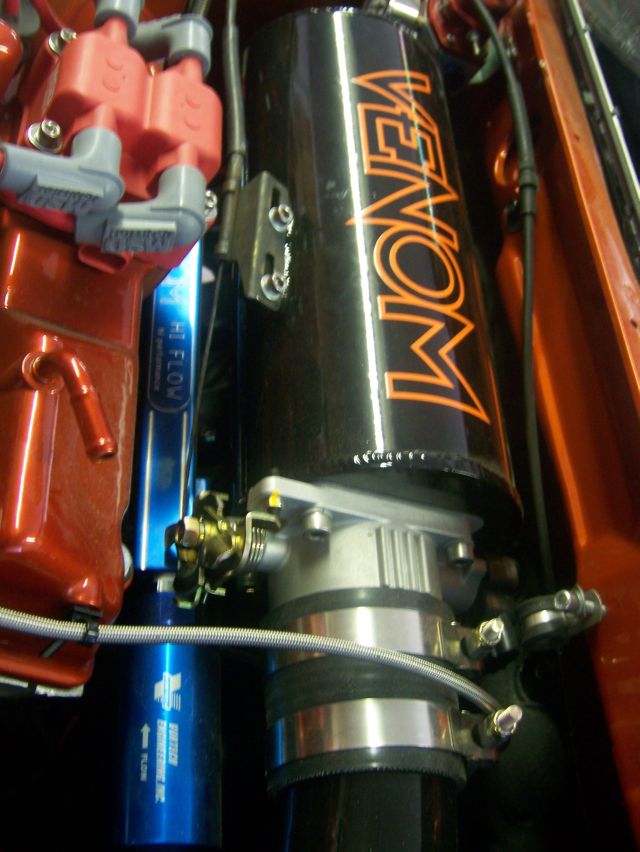
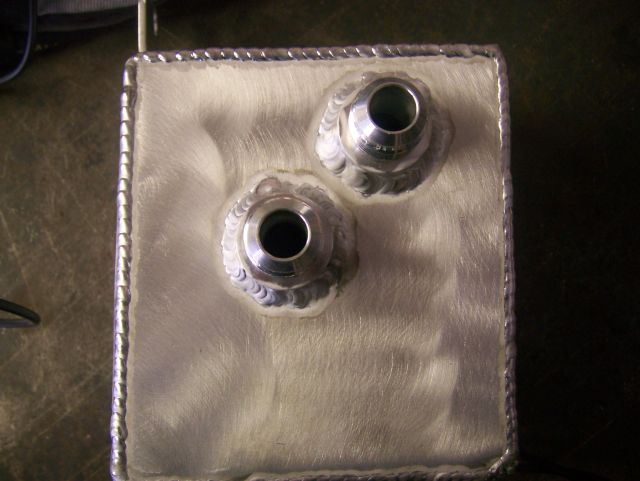
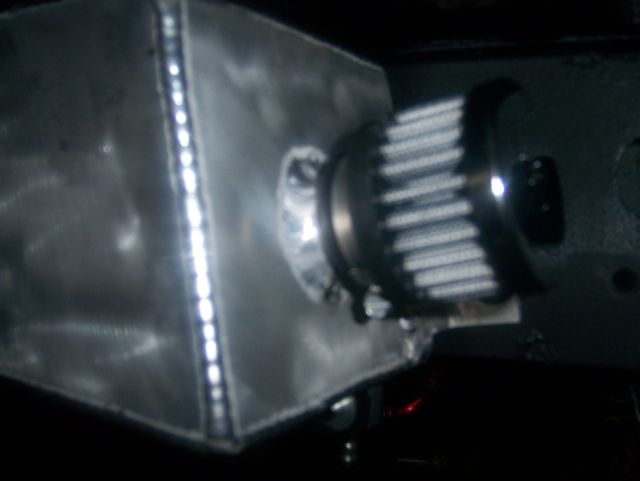
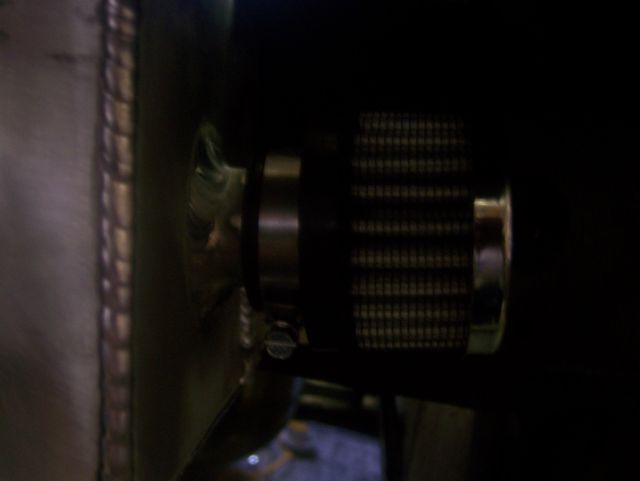
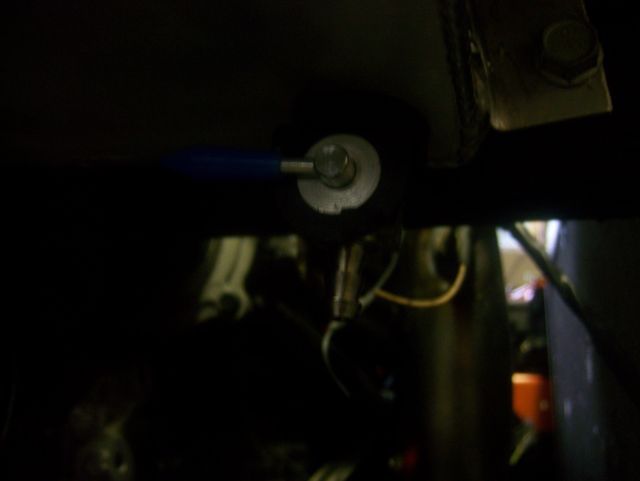
And now for the catch can...I had a piece of 1" OD Al tube laying around in the garage, so I welded that to the front of the can, and picked up a $17 K&N filter from Summit Racing to slap on it. I also remembered (thanks to doug) that I had this little drain cock resting in one of my drawers in my tool box at work, drilled the bottom of the can, and installed that. Catch can setup, check, done.
![]() 
![]() 
![]() 
![]() 
![]() 
![]() 
|
128022, RE: Aluminum battery box and catch can
Posted by CODE4, Dec-31-69 06:00 PM
Mike, love the work and welds.
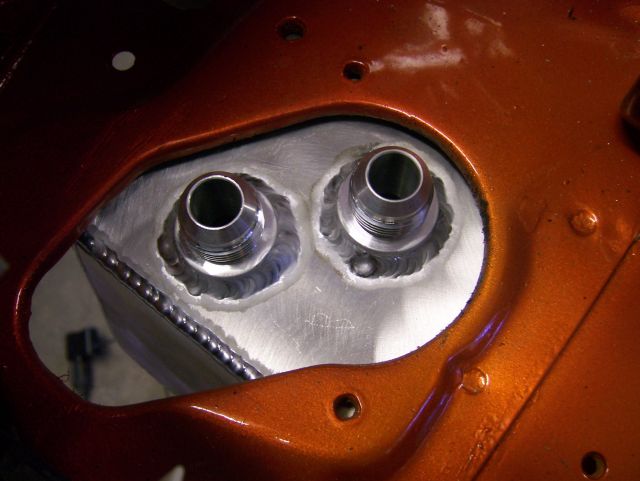
I was curious why you mounted the filter so low - space constraints? having it at that level effectively reduces the oil capacity of the catch can as it will spill out of the filter if it ever reaches that level.
Additionally, if you do not foresee accumulating that much oil from the breather setup why was the box made to those dimensions? For a breather setup could you not have reduced the size in half and had the same results?
I cannot tell completely what how it looks in the fenderwell from the pictures but maybe you could explain your design strategy a bit more.
|
128025, RE: Aluminum battery box and catch can
Posted by eclipse982nrRST, Dec-31-69 06:00 PM
Originally posted by CODE4
Mike, love the work and welds. I was curious why you mounted the filter so low - space constraints? having it at that level effectively reduces the oil capacity of the catch can as it will spill out of the filter if it ever reaches that level. Additionally, if you do not foresee accumulating that much oil from the breather setup why was the box made to those dimensions? For a breather setup could you not have reduced the size in half and had the same results? I cannot tell completely what how it looks in the fenderwell from the pictures but maybe you could explain your design strategy a bit more.
There is not a lot of design or theory behind the can setup. Just something small in case of serious blow by issues. The filter was installed where it was for spacing to be honest. I hope the can never gets that full :)
Thanks for the compliments of the welds though, I love welding aluminum :thumbsup
|
128023, RE: Aluminum battery box and catch can
Posted by CODE4, Dec-31-69 06:00 PM
Double post.
|
128024, RE: Aluminum battery box and catch can
Posted by 420agreenvilleSC, Dec-31-69 06:00 PM
i think if your car was submerged in a river, the battery would remain dry w/ that box. very nice. lol
|
128054, RE: Aluminum battery box and catch can
Posted by djtrickee, Dec-31-69 06:00 PM
Originally posted by 420agreenvilleSC
i think if your car was submerged in a river, . lol
Ya, you are right... we can only hope...

.
|
128080, RE: Aluminum battery box and catch can
Posted by Flipboi89, Dec-31-69 06:00 PM
Clean welds mikey.
|