| Go back to previous topic |
| Forum name | Performance/Engine |
| Topic subject | The build. |
| Topic URL | http://forums.2gnt.com/dcboard.php?az=show_topic&forum=5&topic_id=110205 |
110205, The build.
Posted by eclipse982nrRST, Dec-31-69 06:00 PM
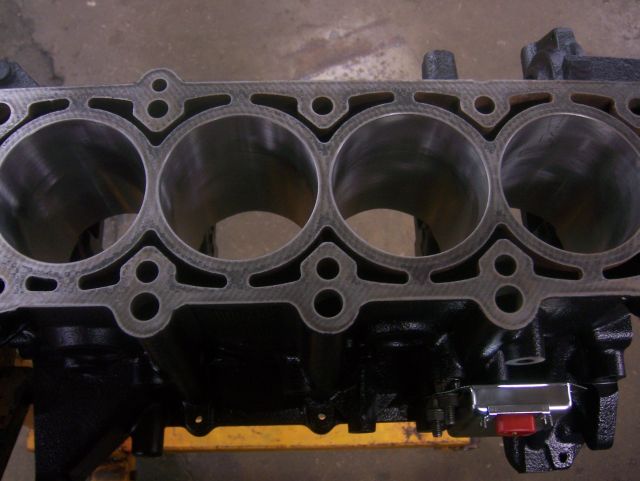
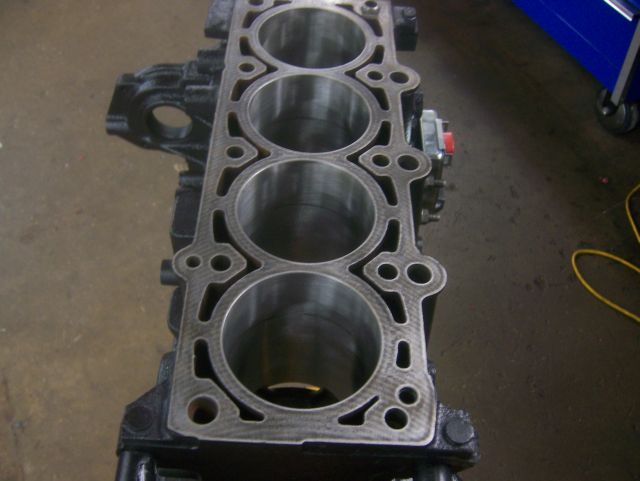
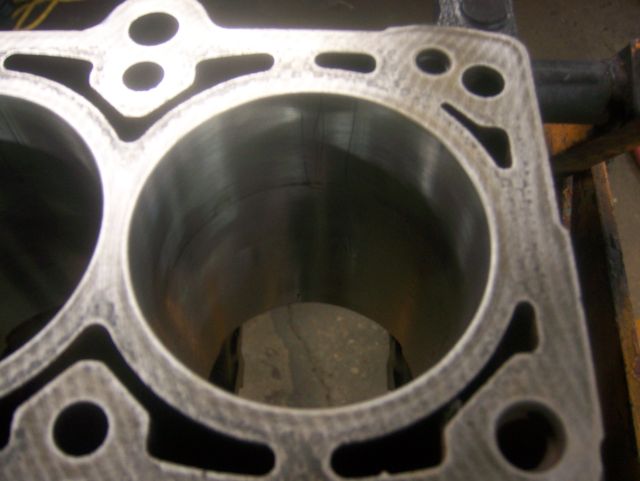
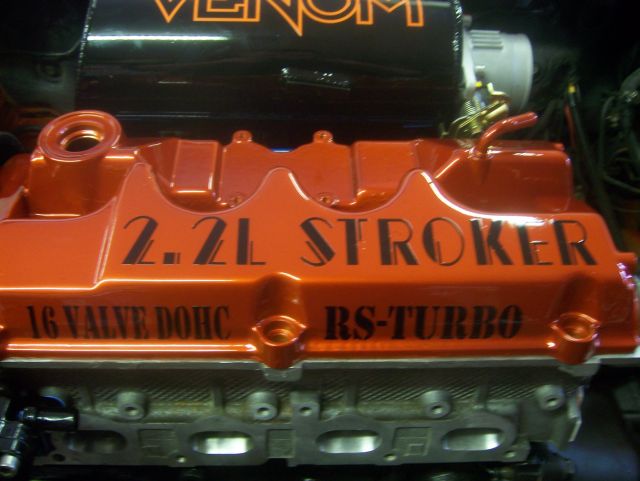
Word is out and a lot of people know, so, here it is. The secret is a 2.2L stroker. Yes, thats what I have been up to. So, here are a few pics from today's work. Did not get very much done.
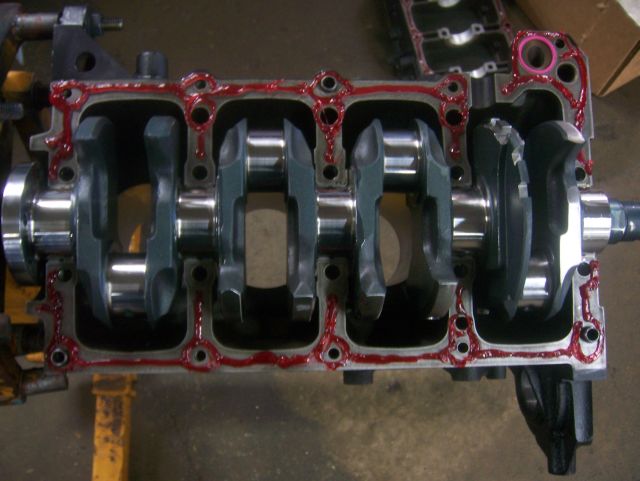
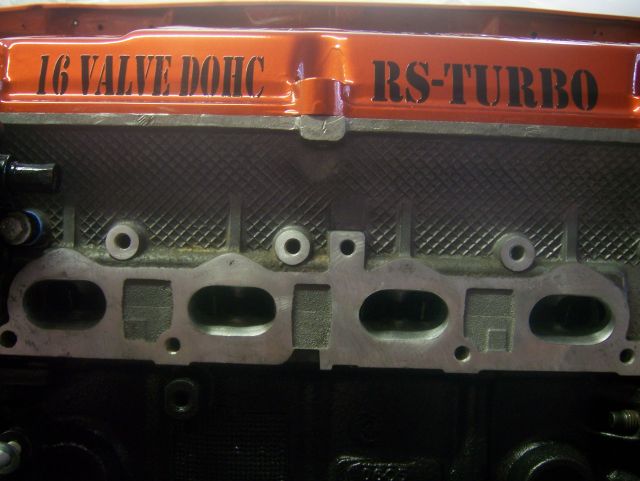
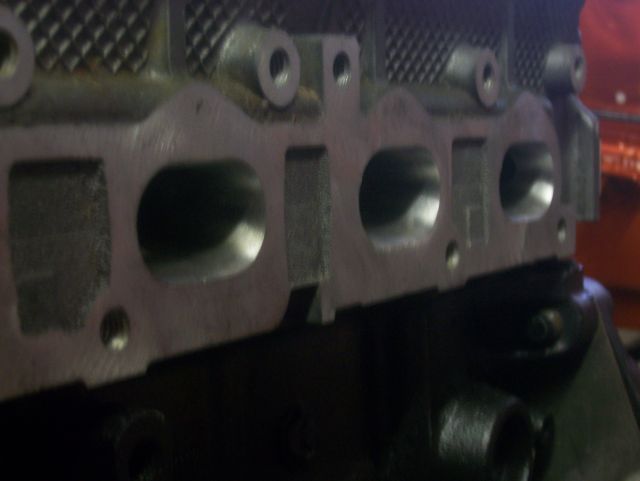
Few pics of the block. 95' block bored 40 over and honed, was completely degreased and checked for cracks and everything. The rotating assembly was balanced as well. Crank is the Callies custom stroker crank. Eagle Rods, JE 8.8:1 pistons and total seal rings.

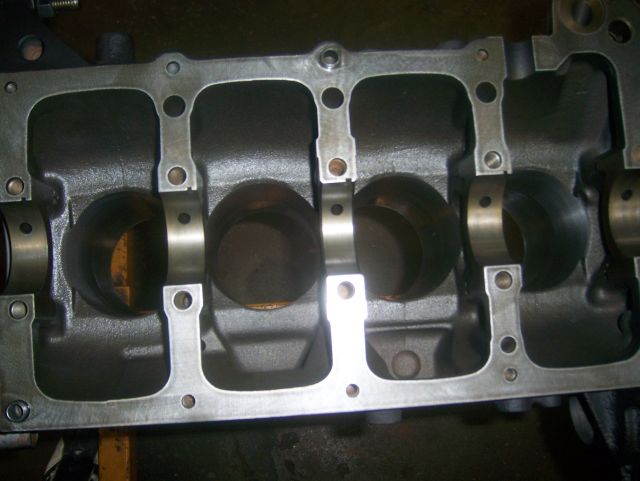
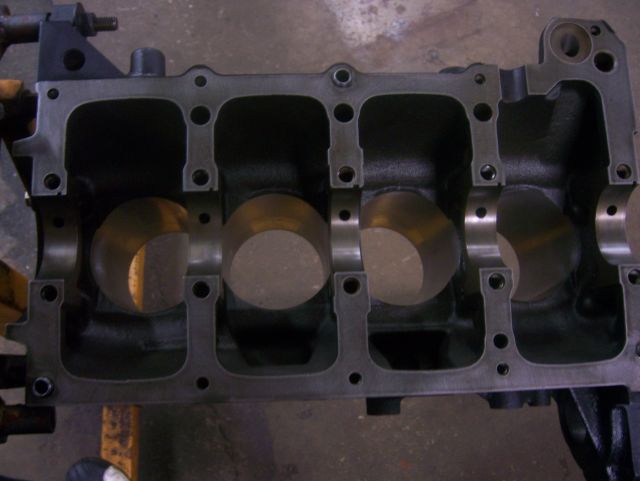
So, next was to start assembling this hog. Got the lower set of bearings in, went to put the top in and noticed the notch was on the wrong side! I never knew that the 95 bedplates were nocthed differently. So, besides waiting another week for another set of bearings to use, why not just notch the bedplate yourself? I am supposed to be a professional right? lol. So, yes, I notched it myself.
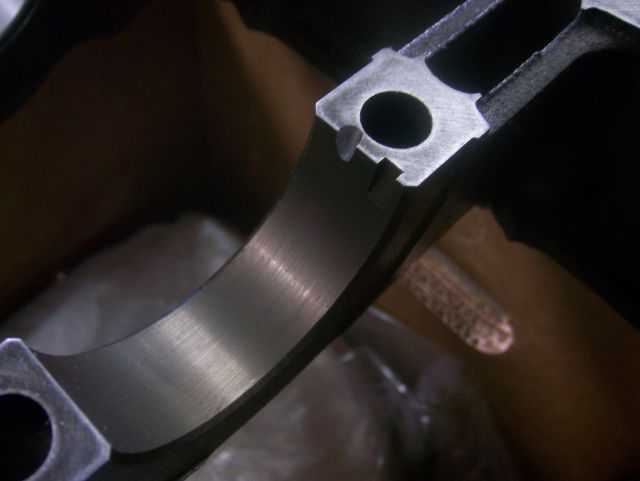
Bearings in.
Went ahead and plastigaged everything to make sure all my clearences were okay.
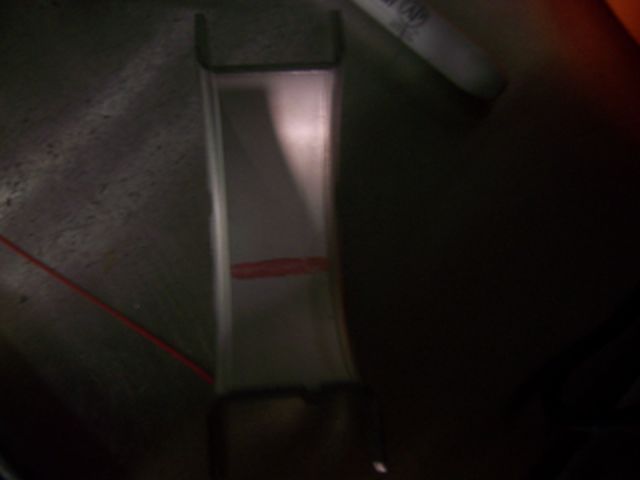
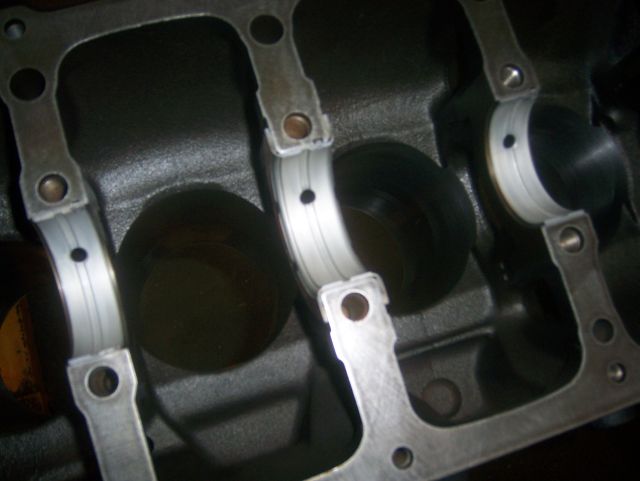
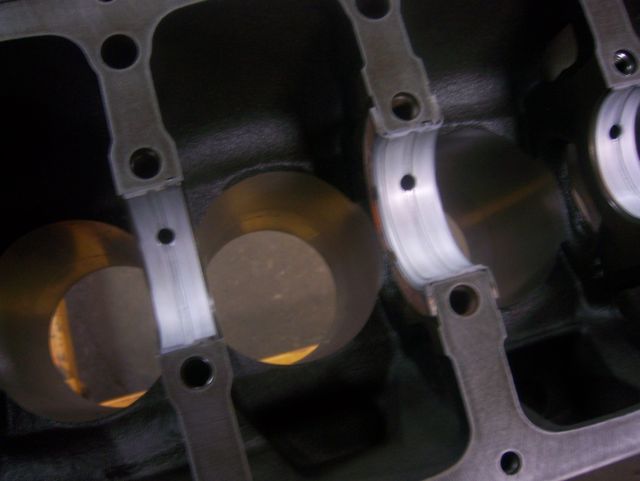
Then went ahead and put the crank in, put my gasket sealer around the block and this time, i did not forget the ORING!!!!
I will get some more pics tomorrow of the bedplate bolted up. I also started to try and get the pistons in the walls, but I am having some issues. The oil rings slide right in but as soon as I get to the 2nd compression ring, it gets VERY tight. I did not like it, so I called it a day. I go back to work tomorrow, so we will see if I can squeeze them in...
|
110206, RE: The build.
Posted by bullettdsm, Dec-31-69 06:00 PM
IMO, get rid of the total seal rings.
|
110208, RE: The build.
Posted by djtrickee, Dec-31-69 06:00 PM
What the shit. All this time and money and rubbish talk and you wimped out and only are building a 2.2. lol. Ghey.
|
110209, RE: The build.
Posted by SilvrEclips, Dec-31-69 06:00 PM
Looks good man, what happens if you forget to put the oring in? I dont remember if I put mine in or not.
|
110210, RE: The build.
Posted by 420agreenvilleSC, Dec-31-69 06:00 PM
very impressive mike. i really like it. yea i was gonna put my bedplate on and almost forgot the oring. lol. caught it in time. curious why you chose TS rings and not je's? your choice i know. anyway, keep the progress coming. awesome so far. how much did you spend for the crank??
|
110211, RE: The build.
Posted by eclipse982nrRST, Dec-31-69 06:00 PM
I do not have a problem with using TS.
I ran them on the 2.0 for 2 years with no problems. Swapped to JE's when I had the head off once and noticed no difference at all. Only problem I see with people having issues with TS's is because they arent installed correctly.
EDIT: Chris, what are you talking about me whimping out? Maybe because you guys thought i was building a 2.4 all along and I wasnt?
|
110212, RE: The build.
Posted by teklein, Dec-31-69 06:00 PM
Whats the shiny thing bolted to it?
Great job btw :P
|
110213, RE: The build.
Posted by eclipse982nrRST, Dec-31-69 06:00 PM
Originally posted by teklein
Whats the shiny thing bolted to it? Great job btw :P
Oh yeah, forgot to mention it. That is an old school Chrysler voltage regulator. I need it for the alternator since I will no longer be using the stock ECU.
|
110214, RE: The build.
Posted by foggy45, Dec-31-69 06:00 PM
Originally posted by eclipse982nrRST
So, besides waiting another week for another set of bearings to use, why not just notch the bedplate yourself? I am supposed to be a professional right? lol. So, yes, I notched it myself.
don't worry man, lots of people with 96+ bedplates notch them themselves so they have the ability to run a 360* grove set of main bearings.
|
110215, RE: The build.
Posted by barza21, Dec-31-69 06:00 PM
good memories are coming back! Hope you actually achieve your 400whp dude, you dont want a little 2.0L beating you, do you ? ;-)
good luck with the build, keep us updated.
|
110220, RE: The build.
Posted by 1slw97, Dec-31-69 06:00 PM
Looking good!!
|
110221, RE: The build.
Posted by 96TurboGS, Dec-31-69 06:00 PM
On your way to 400 fucking hp. Just by curiosity what did the last set up make (hp wise)?
|
110224, RE: The build.
Posted by Flipboi89, Dec-31-69 06:00 PM
awww the memories lol. hope this build is gonna last a longer time keep us updated.
|
110238, RE: The build.
Posted by eclipse982nrRST, Dec-31-69 06:00 PM
Well, Saturday was a good day. No pics because I forgot my camera.
But, I got the following done.
Oil pump and pickup installed.
Water pump and outlet pipe installed.
Drilled and tapped oil pan for -10AN return and put pan on.
Got the head on and torqued the ARP head studs to 92ft lbs.
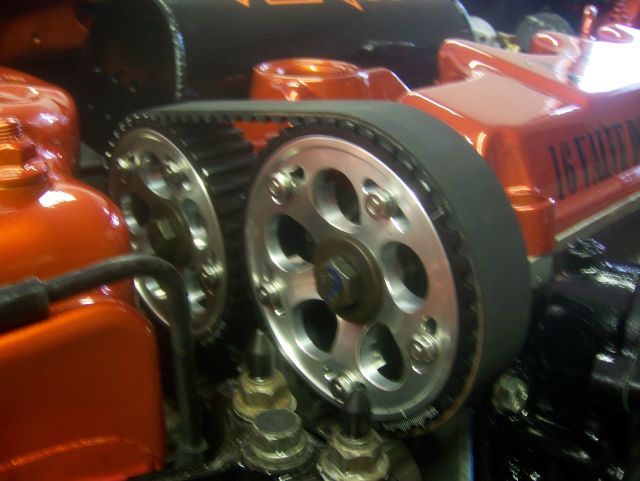
New lifters and rocker arms in, and got the cams in, but havent torqued the caps yet.
Tomorrow I should have the rest of the motor built. I should be able to get the cams torqued and gears put on, get the timing done and throw the intake and TB on it.
|
110254, RE: The build.
Posted by adammethner2005, Dec-31-69 06:00 PM
Glad to see everything is coming together nicely. I'm finally starting to get that motor put together. Nice job remembering the o-ring this time :P
|
110257, RE: The build.
Posted by talonesiracing, Dec-31-69 06:00 PM
you did grind the bedplate for clearance issues right??
|
110283, RE: The build.
Posted by eclipse982nrRST, Dec-31-69 06:00 PM
Originally posted by talonesiracing
you did grind the bedplate for clearance issues right??
You talking about where the rod cap bolt came to about .005" close to the bedplate I am guessing?
I actually didnt grind the bedplate, I just went ahead and ground down the one rod cap bolt on each rod, slotted it nicely and worked out perfect.
|
110286, RE: The build.
Posted by bullettdsm, Dec-31-69 06:00 PM
Originally posted by eclipse982nrRSTOriginally posted by talonesiracing you did grind the bedplate for clearance issues right?? You talking about where the rod cap bolt came to about .005" close to the bedplate I am guessing? I actually didnt grind the bedplate, I just went ahead and ground down the one rod cap bolt on each rod, slotted it nicely and worked out perfect.
FWIW next time grind the non moving part. No balance situation.
MB
|
110290, RE: The build.
Posted by stracer107, Dec-31-69 06:00 PM
how are you doing your ecu? you said your not using the stock one.
|
110260, RE: The build.
Posted by 97AllMtr, Dec-31-69 06:00 PM
Originally posted by adammethner2005
Glad to see everything is coming together nicely. I'm finally starting to get that motor put together. Nice job remembering the o-ring this time :P
What O-ring? :scratch
|
110282, RE: The build.
Posted by thormx353, Dec-31-69 06:00 PM
nice job man, im doing a build myself. I'm a little anxious to get it done haha
|
110285, RE: The build.
Posted by teklein, Dec-31-69 06:00 PM
Anymore pics?
|
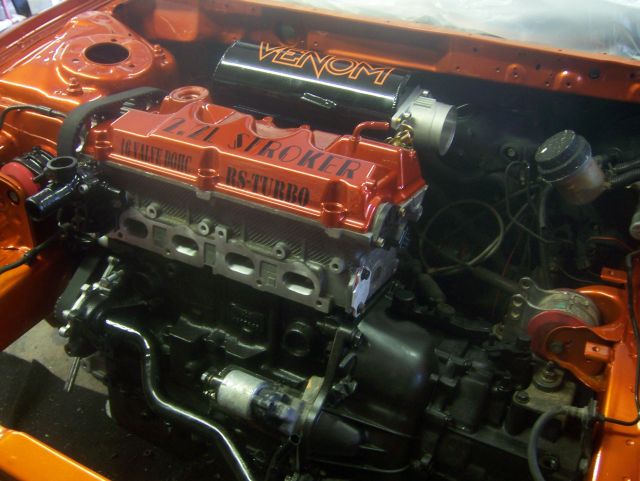
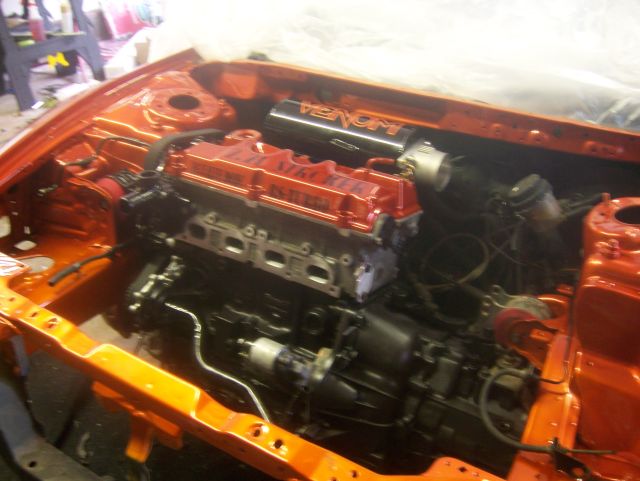
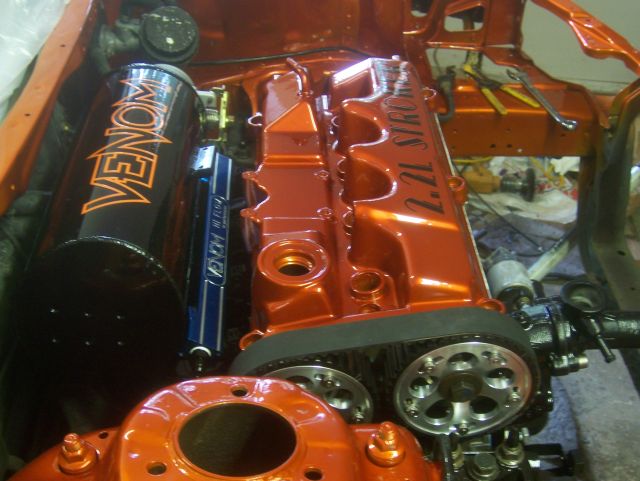
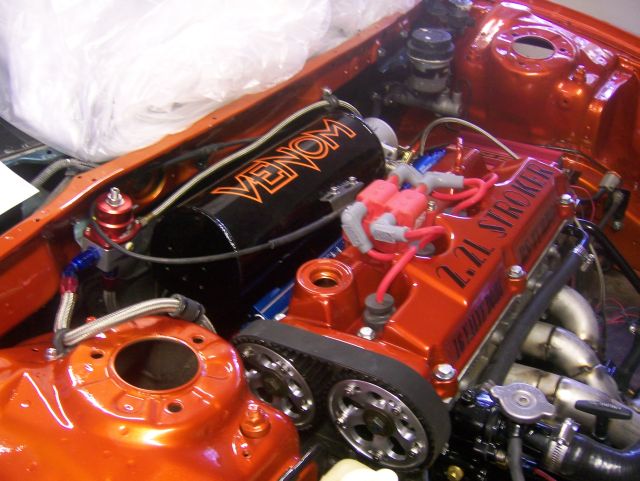
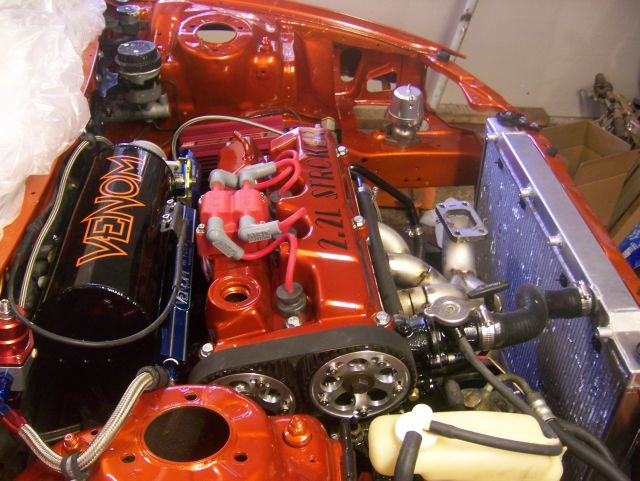
110300, Motor is in !!!
Posted by eclipse982nrRST, Dec-31-69 06:00 PM
Well, about 30 minutes, I bolted the motor back into the car. Here are a few pics I took. Unfortunately I didnt have my camera at the shop when I finished building the engine itself.
Anyway, here she is.


|
110301, RE: Motor is in !!!
Posted by SilvrEclips, Dec-31-69 06:00 PM
Looks sweet man.. when is the rest of the car going to be finished?
|
110302, RE: Motor is in !!!
Posted by eclipse982nrRST, Dec-31-69 06:00 PM
Originally posted by SilvrEclips
Looks sweet man.. when is the rest of the car going to be finished?
Hopefully end of November.
|
110303, RE: Motor is in !!!
Posted by 420agreenvilleSC, Dec-31-69 06:00 PM
sick man. just sick. keep it up
|
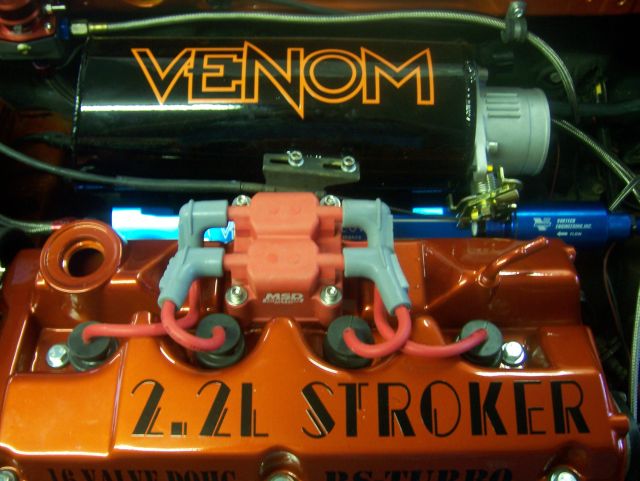
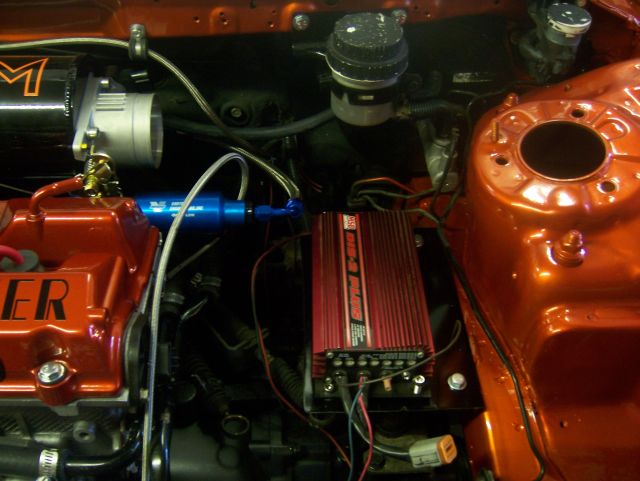
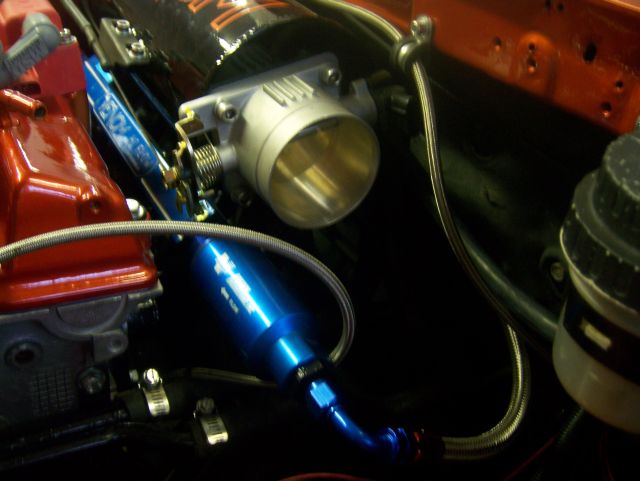
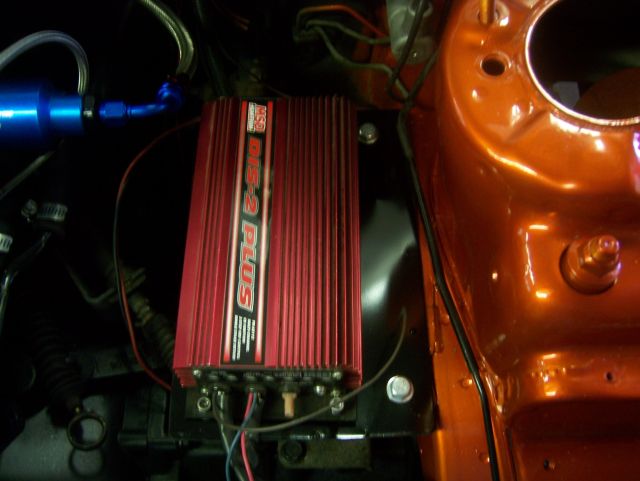
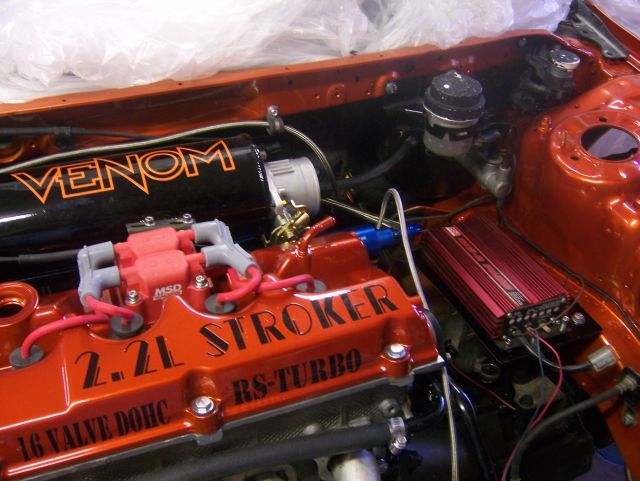
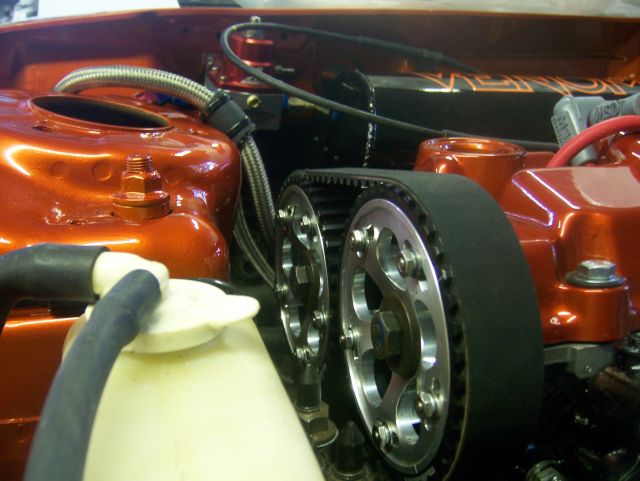
110496, Half way done w/ new pics
Posted by eclipse982nrRST, Dec-31-69 06:00 PM
I am about half way done with this project...here are some new pics from previous weeks progress.

|
110497, RE: Half way done w/ new pics
Posted by Murfsmaster, Dec-31-69 06:00 PM
That looks amazing mike. I wish my engine bay was half as nice as that. Keep it up
|
110499, RE: Half way done w/ new pics
Posted by eclipse RS-T, Dec-31-69 06:00 PM
Looks badass! Great work :thumbsup
|
110500, RE: Half way done w/ new pics
Posted by bullettdsm, Dec-31-69 06:00 PM
Lots of bling-ass clean stuff (stuff I know nothing about, lol). Looks great.
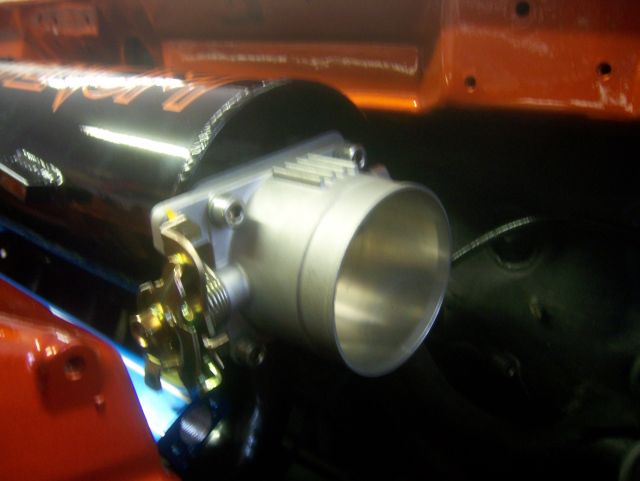
Never caught what TB you are using. Mustang?
When you get done with this, you may want to switch out the intake for an AMM. I switched out the OBX (yeah, I know not the same thing. But same size) on the turbo and the difference was palpable. better response and quicker spool (haven't got it on the dyno yet).
|
110502, RE: Half way done w/ new pics
Posted by eclipse982nrRST, Dec-31-69 06:00 PM
Originally posted by bullettdsm
Lots of bling-ass clean stuff (stuff I know nothing about, lol). Looks great. Never caught what TB you are using. Mustang? When you get done with this, you may want to switch out the intake for an AMM. I switched out the OBX (yeah, I know not the same thing. But same size) on the turbo and the difference was palpable. better response and quicker spool (haven't got it on the dyno yet).
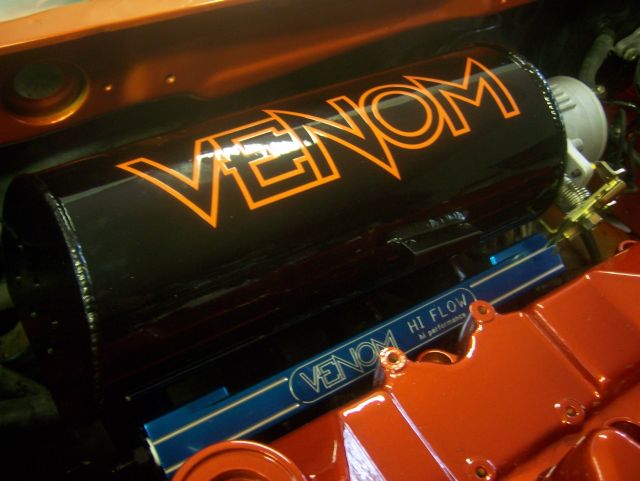
I was already talking with AMM from the beginning of this project, thats why I initially sold my old Venom manifold to Paul.
However, his ideas and design are badass, but I unfortunately do not like how the manifold bolts up. I dont like how its down so low and you can see the entire firewall, lol.
Not very much bling bling stuff, just a nice fresh painted engine bay and the i/M and v/c are glossy!
Thanks for the comments though guys.
|
110503, RE: Half way done w/ new pics
Posted by turbo8u, Dec-31-69 06:00 PM

...:cheers
|
110506, RE: Half way done w/ new pics
Posted by eclipse982nrRST, Dec-31-69 06:00 PM
Originally posted by turbo8u ...:cheers
Yeah, now I am living on peanut butter/jelly and hot dogs for lunch every day!!!!
|
110507, RE: Half way done w/ new pics
Posted by Flipboi89, Dec-31-69 06:00 PM
Hah i was just gonna ask where u get all ur money mike lol.
|